Git Remote Connection
This is written following the previous article on Git Introduction, mainly because I encountered quite a few problems when trying to upload some resource files to GitHub.
I think there should be two ways to establish connections that I can currently implement.
Before describing the implementation methods, I think we should understand the remote operation commands.
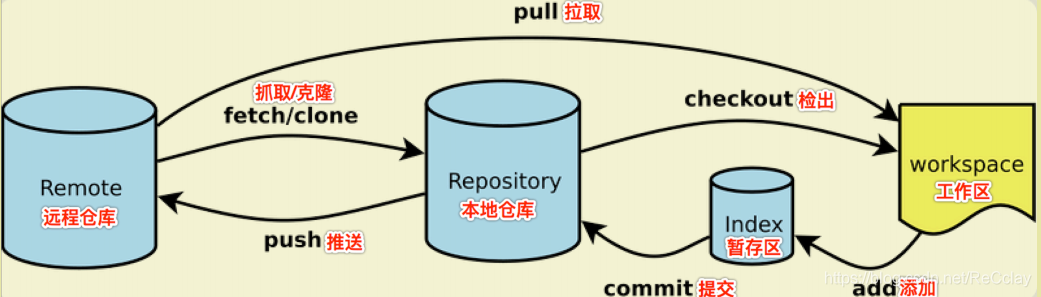
Common Git Commands
1 | git init //Initialize local repository, generate a .git folder, which is the core of git |
Both URL and SSH can be viewed and copied from the code button in the repository interface, SSH is more secure.
Difference between git add . and git add *
git add . adds all files, folders and subfolders, including .gitignore and any other content starting with a dot;
git add * will add any files, folders and subfolders except those starting with a dot.
git add . also respects .gitignore, while git add * will throw an error when any non-dot file is gitignored. Using git add . is much better than git add *.
* is not part of git, it’s a wildcard interpreted by the shell. * expands to all files in the current directory, then passes to git, git adds all files. . is the current directory itself, git add will add it and all files under it.
add * means add all files in the current directory except files whose names start with a dot. This is a shell feature, Git only receives the file list.
add . has no special meaning in the shell, so git recursively adds the entire directory, almost the same, but includes files whose names start with a dot.
Methods to Delete Remote Repository Files
One very important point to note when deleting is that files in the staging area will not be cleared after commit. Similarly, the files you deleted are still in the staging area, and you need to remove the deleted files from the staging area before you can commit.
Delete files or directories from both current working directory and staging area.
git rm <file>
git rm -r <path>
Only delete files or directories from staging area.
git rm --cache <file>
git rm -r --cache <path>
Direct Deletion Method
Directly delete specified files or directories. Suitable for cases where the number of files to be deleted is relatively small.
git rm -r --cached demo
git commit -m 'Delete demo folder'
git push -u origin master
Filter Deletion Method
Add a .gitignore file in the project root directory to filter out unwanted files, then execute commands. The principle of this operation is to delete all files in the staging area, then add files filtered by the .gitignore file to the staging area through the git add . command. This method is suitable for bulk deletion of files.
git rm -r --cached . git add .
git commit git push -u origin master
Whether direct deletion or filter deletion, the purpose is to delete the records of already deleted files in the staging area.
PS: Pay attention to various information in your command line prompts
First Implementation Method (git clone)
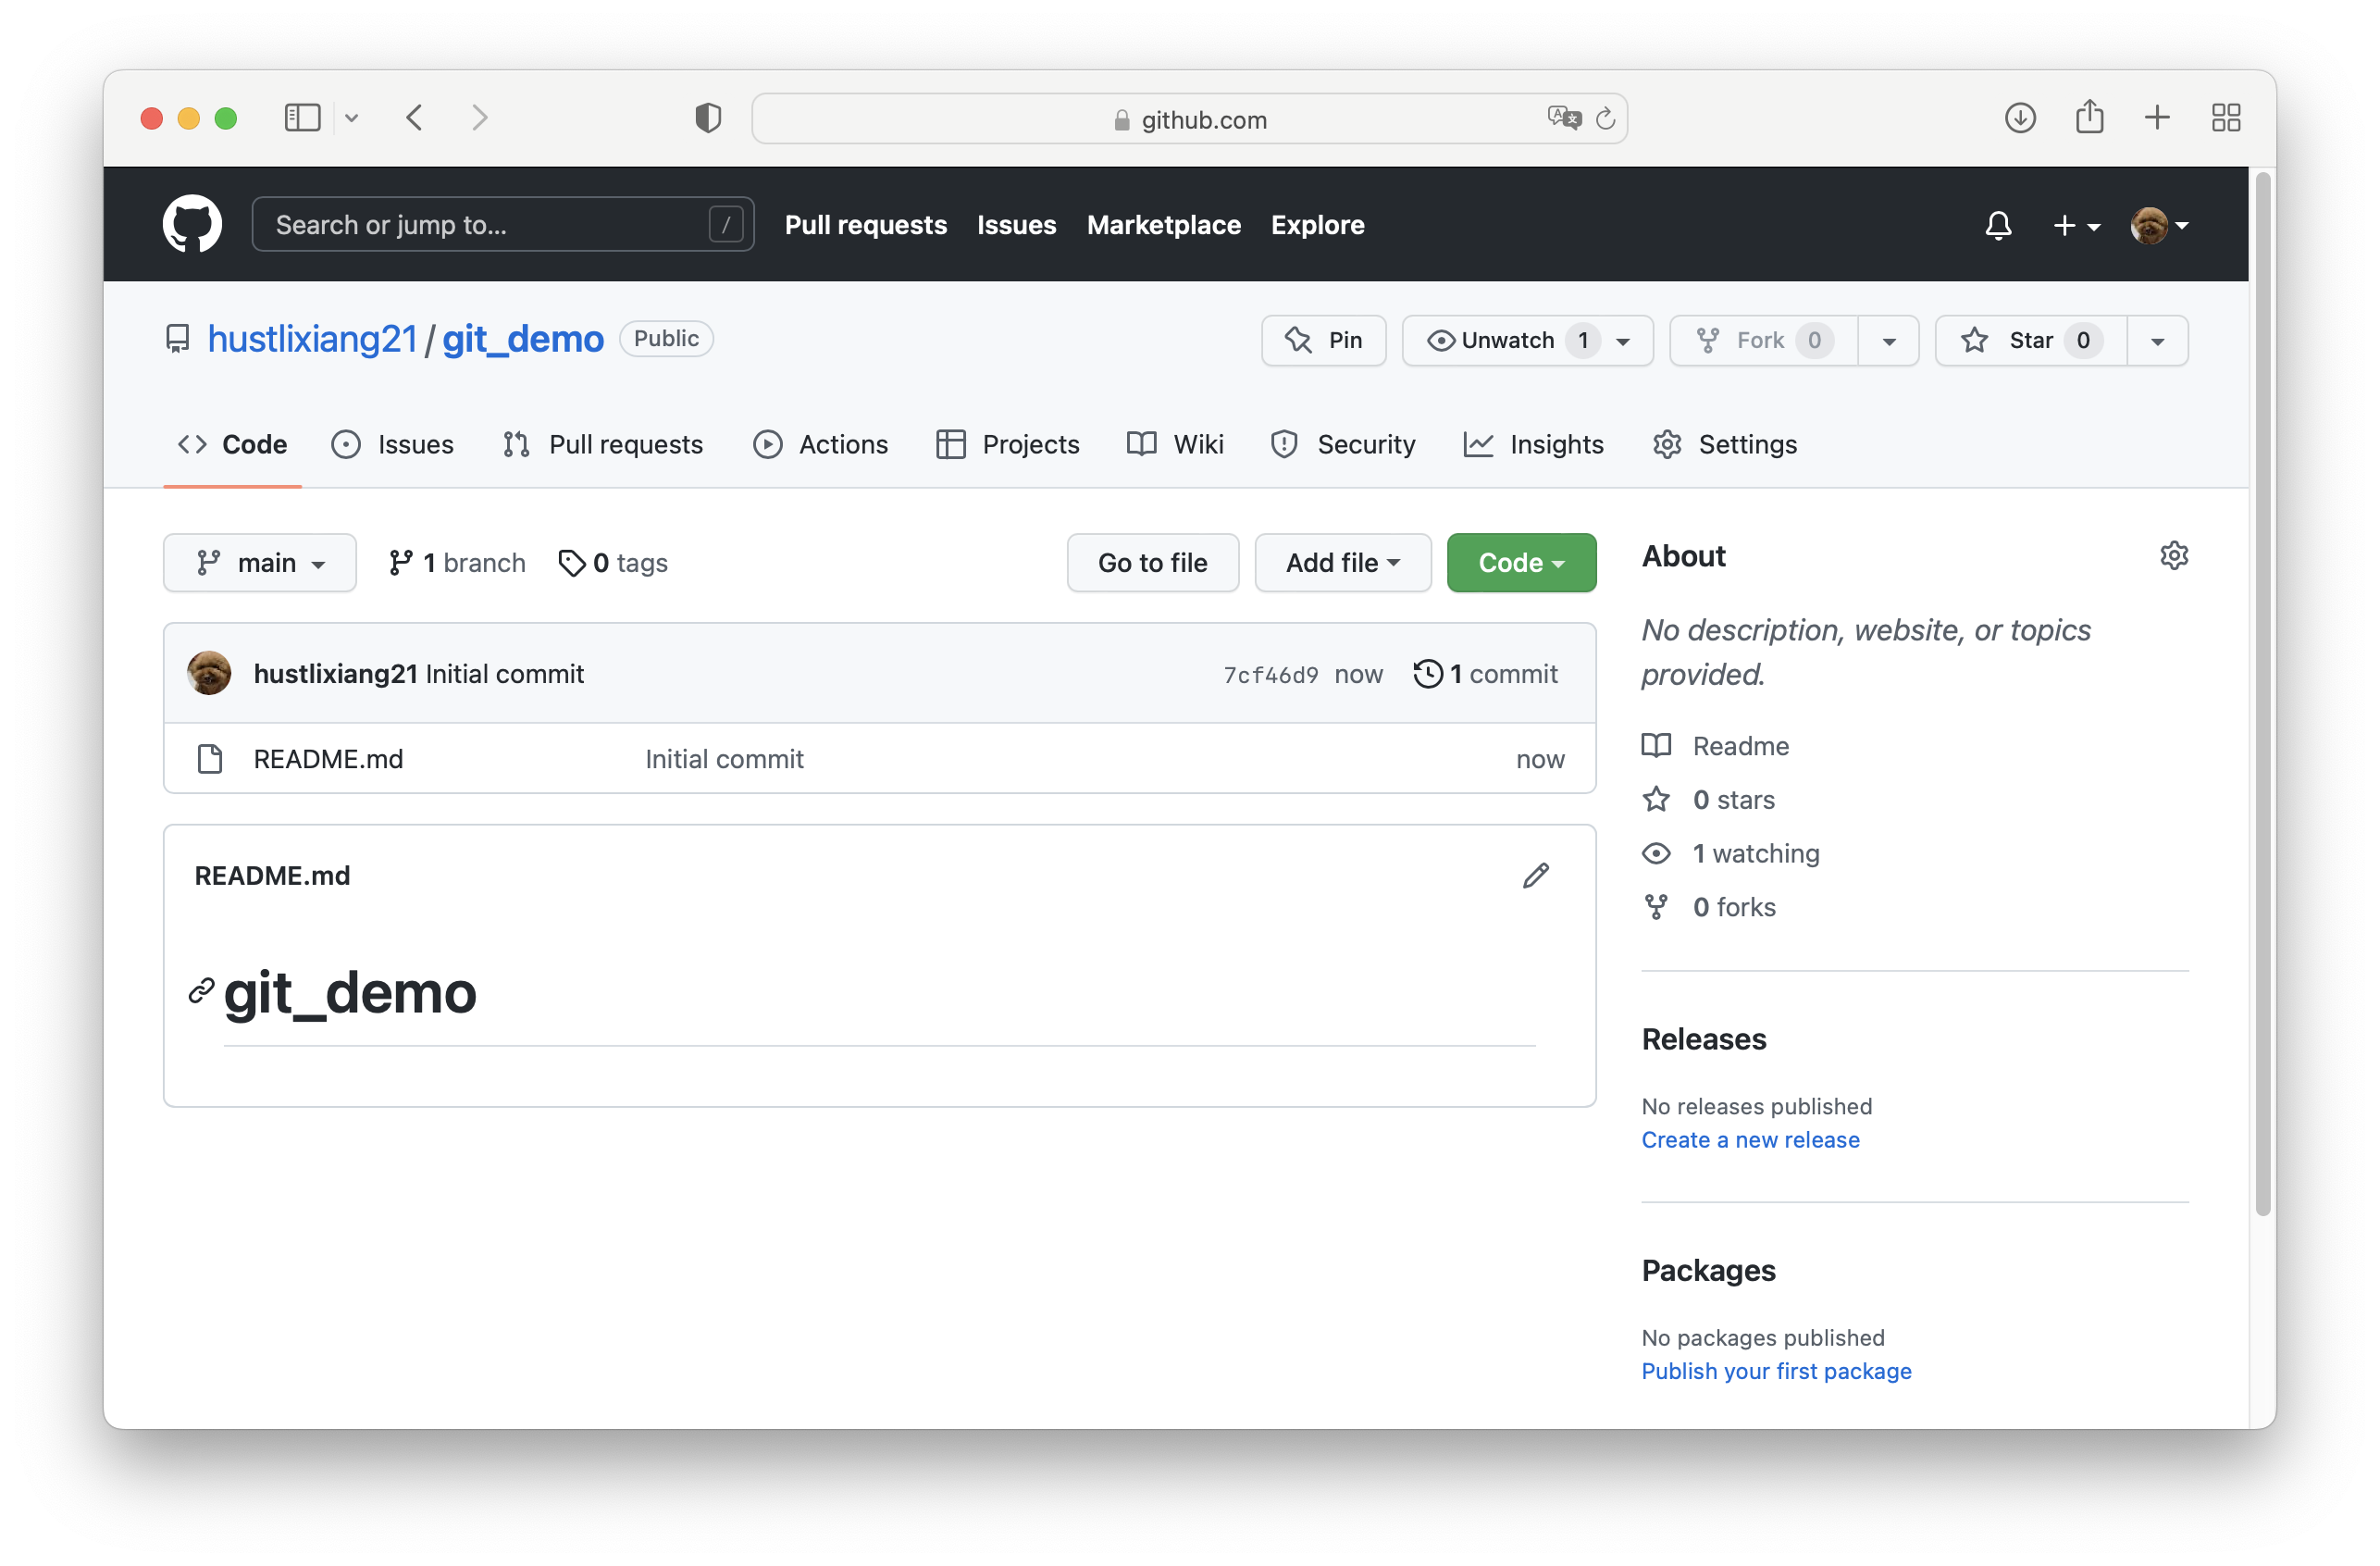
Step1: Create a repository named git_test on GitHub

Step2: Enter a folder
and use git clone
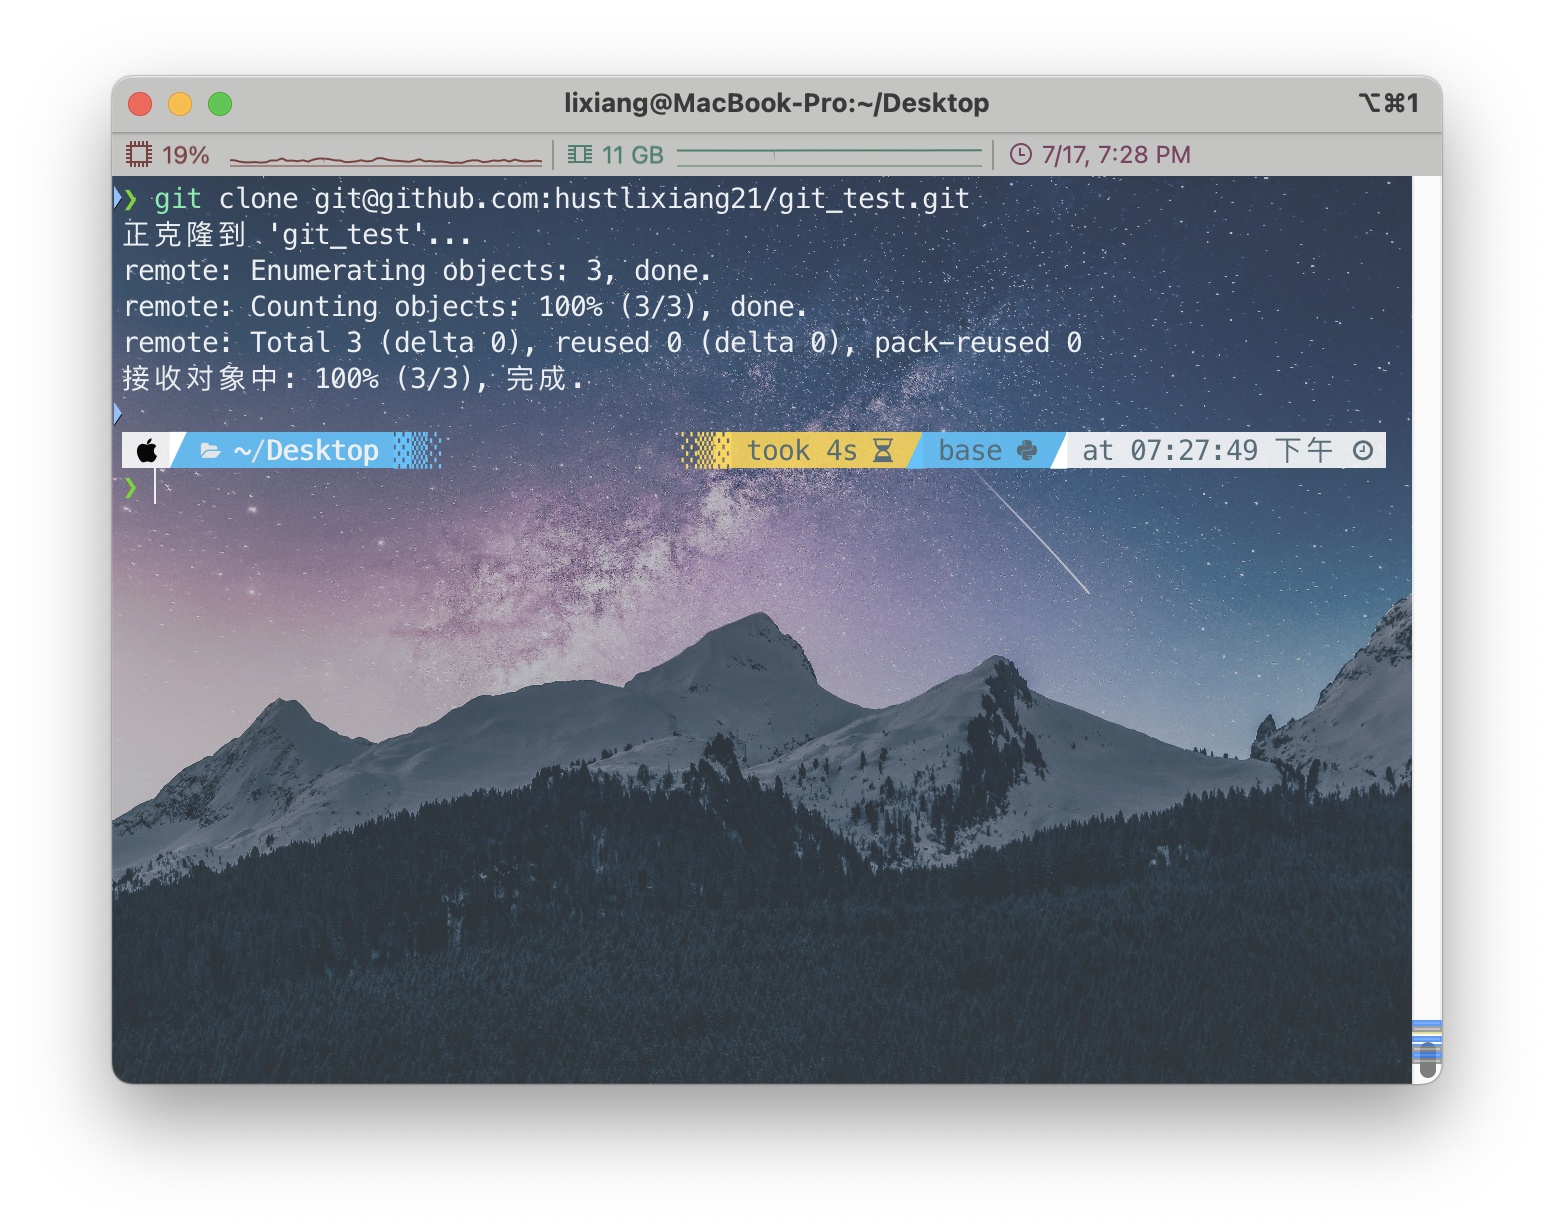
At this point, git clone completely clones the entire repository to local. It will generate a folder with the same name as the repository. Enter the folder and you can directly see the .git file.
Step3: No need for remote connection, automatically established connection (default origin)
Use git remote -v to view remote connection information

Step4: Create test files and commit to remote repository
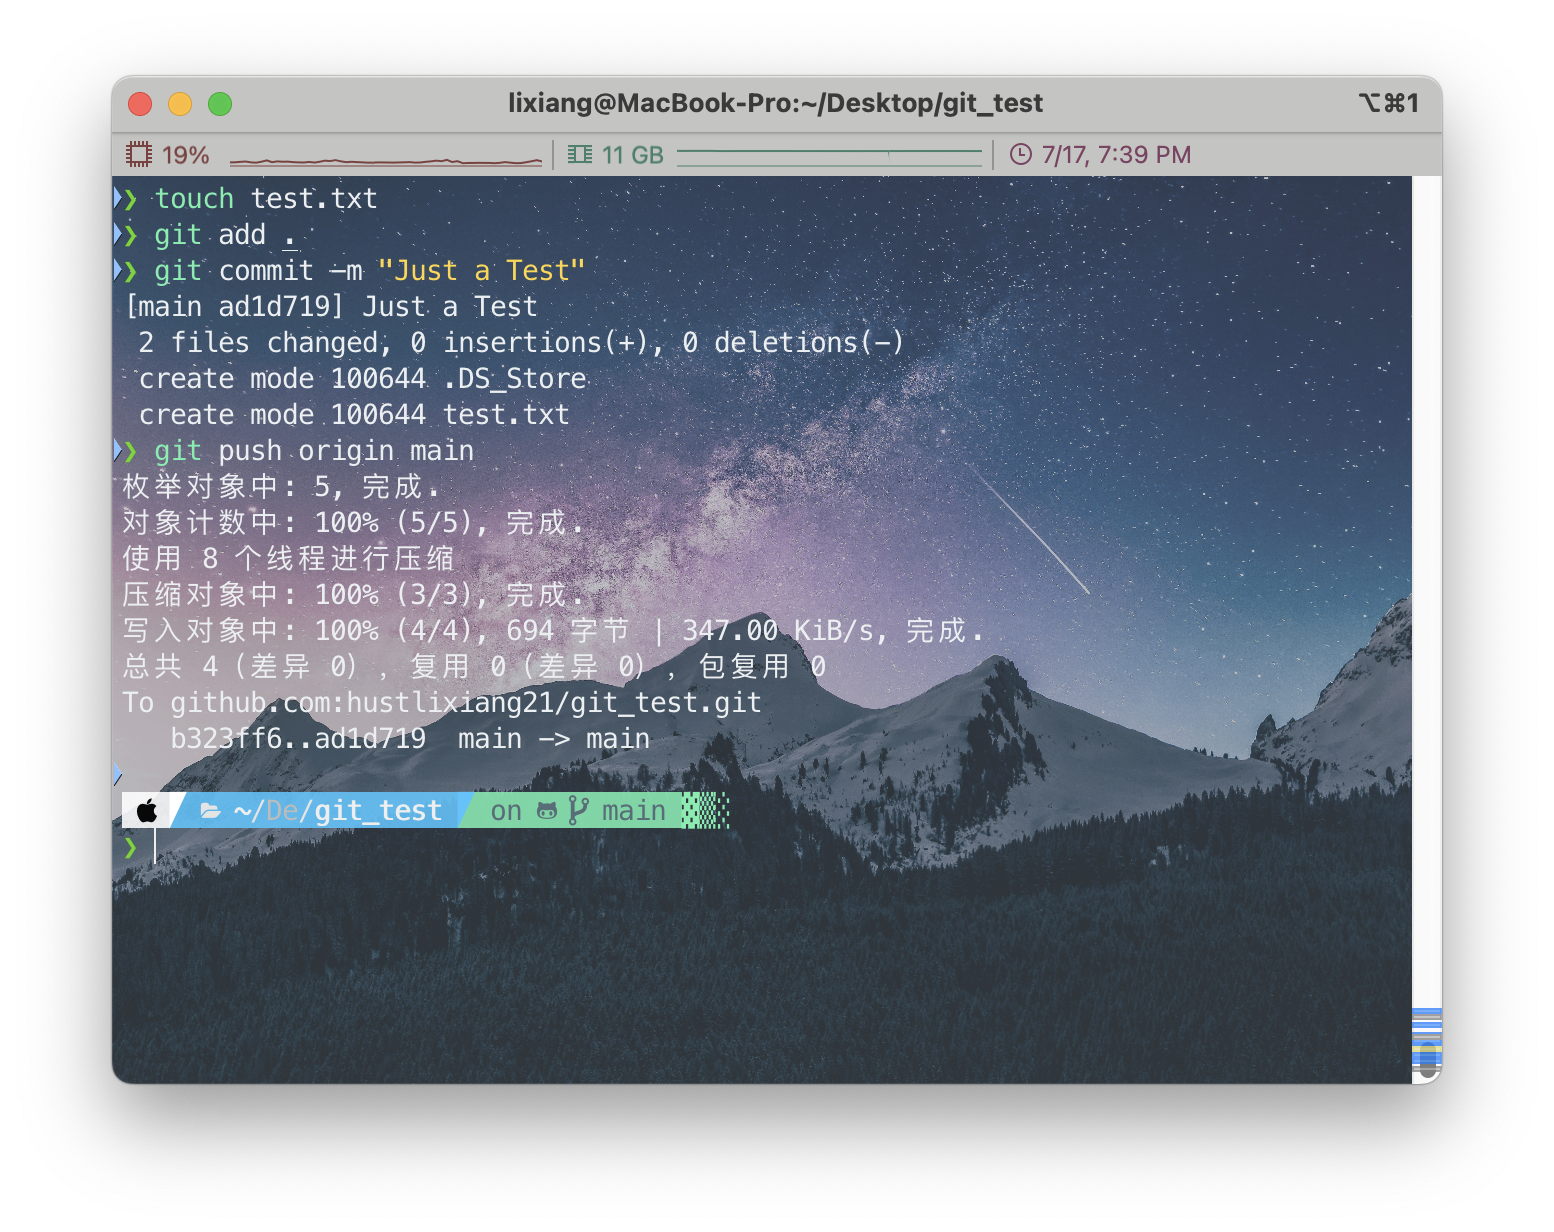
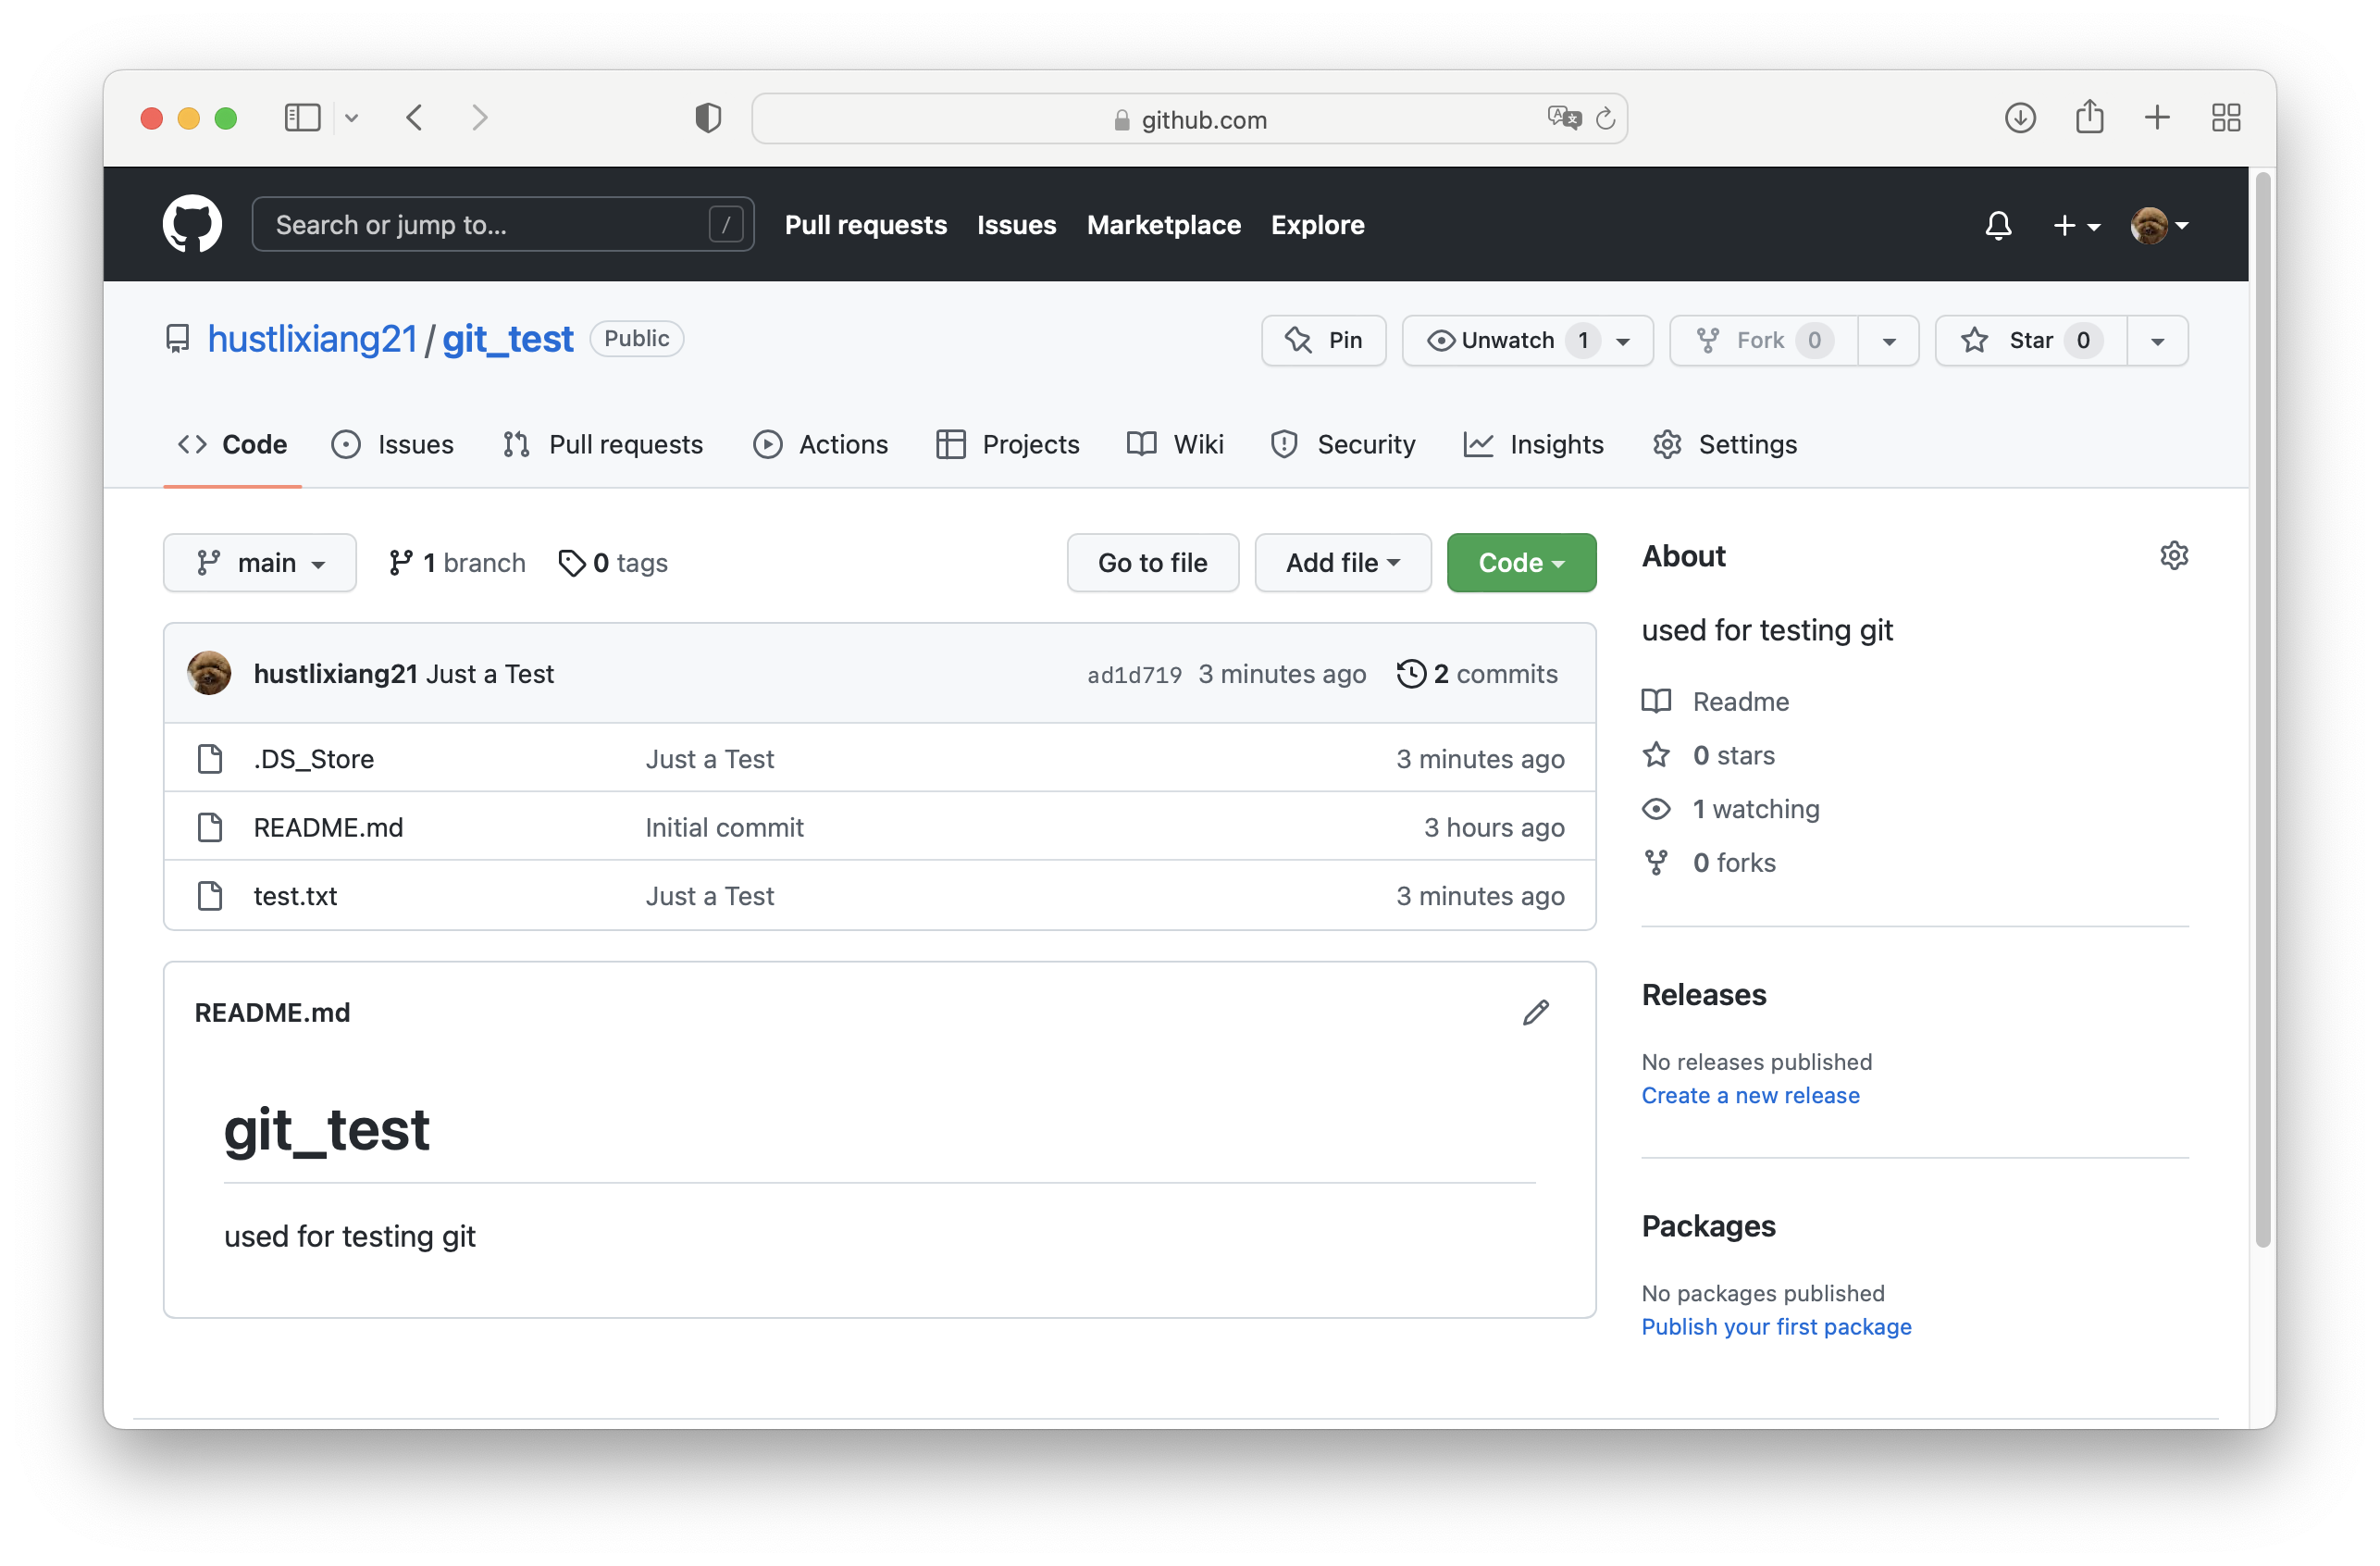
Testing complete!
Second Implementation Method (Initialize Local Repository + Manually Add Connection)
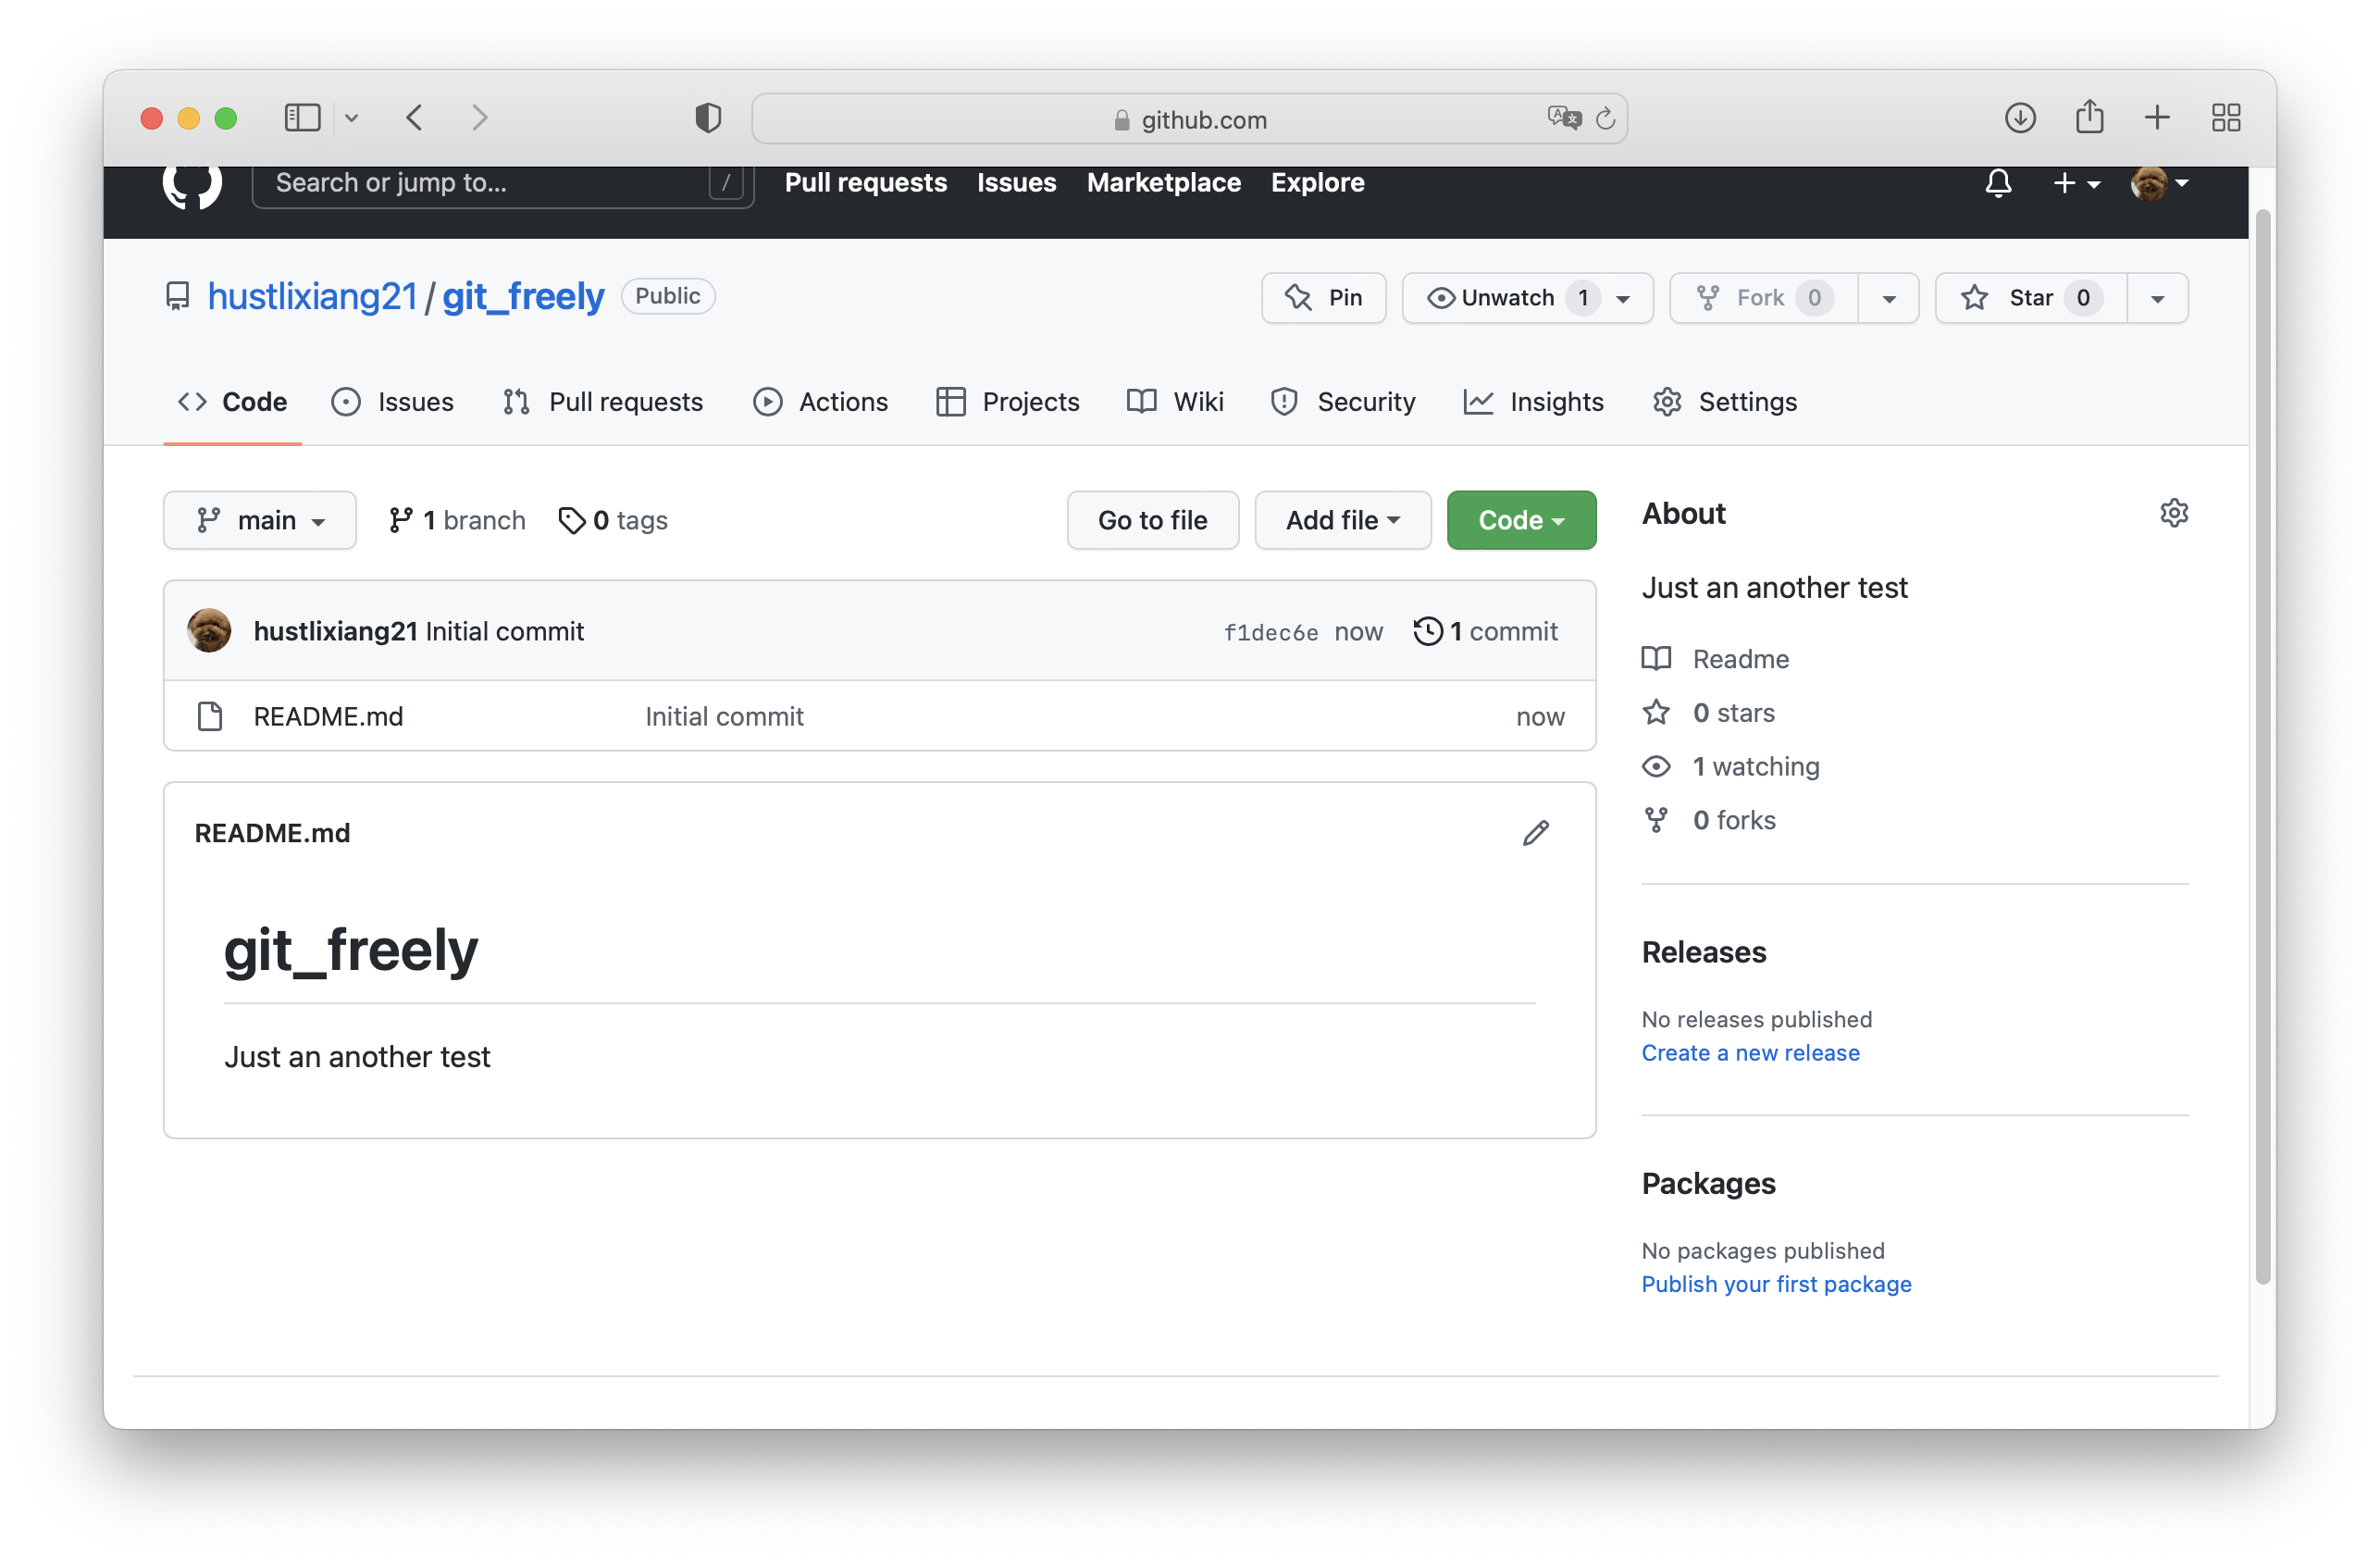
Step1: Create a new repository on GitHub while initializing a local repository
Create new repository:
Enter folder ~/Desktop/git_freely and use git init to initialize local repository
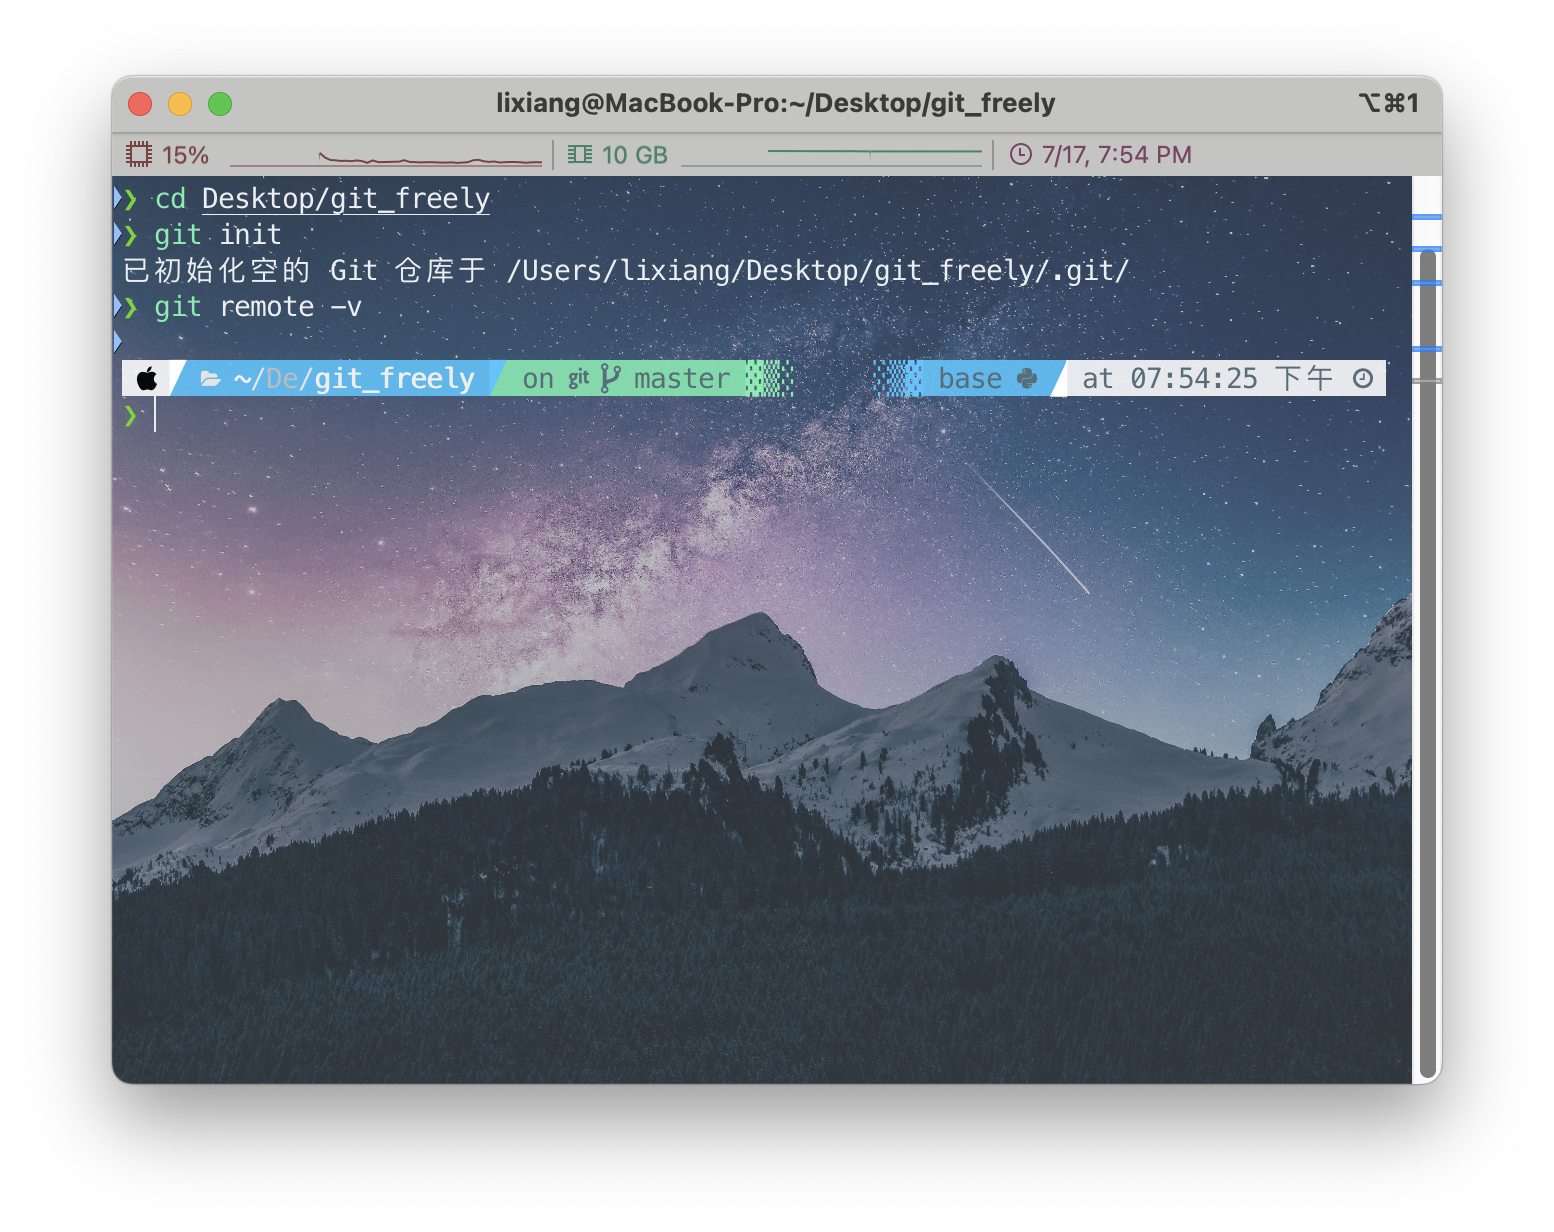
It can also be seen that the local repository has not established a remote connection.
Step2: Establish remote connection
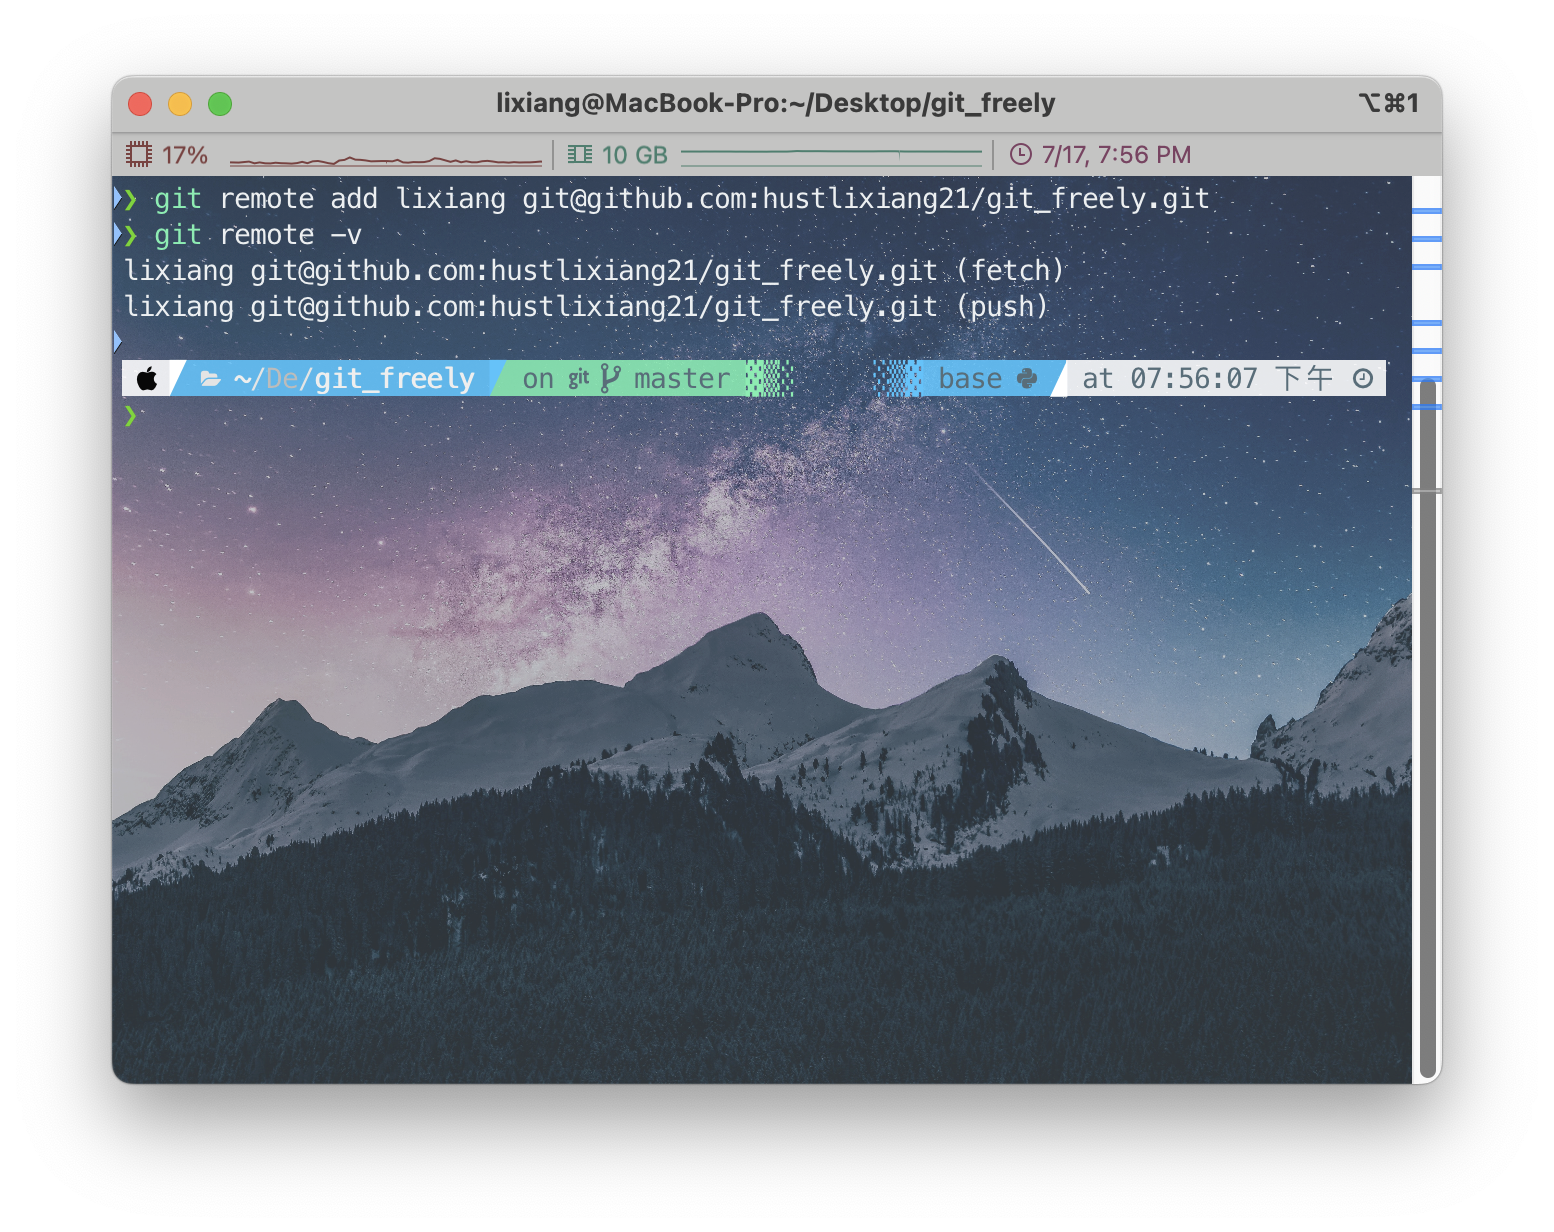
It can be seen that a remote connection has been established at this time, and the name given to the remote repository can actually be arbitrary (usually origin), I named it lixiang.
Ask a question: Can we directly create test files according to the first implementation method at this time, then git add, commit, push?
Since I asked, it’s definitely not possible😄, let’s try it if you don’t believe me.
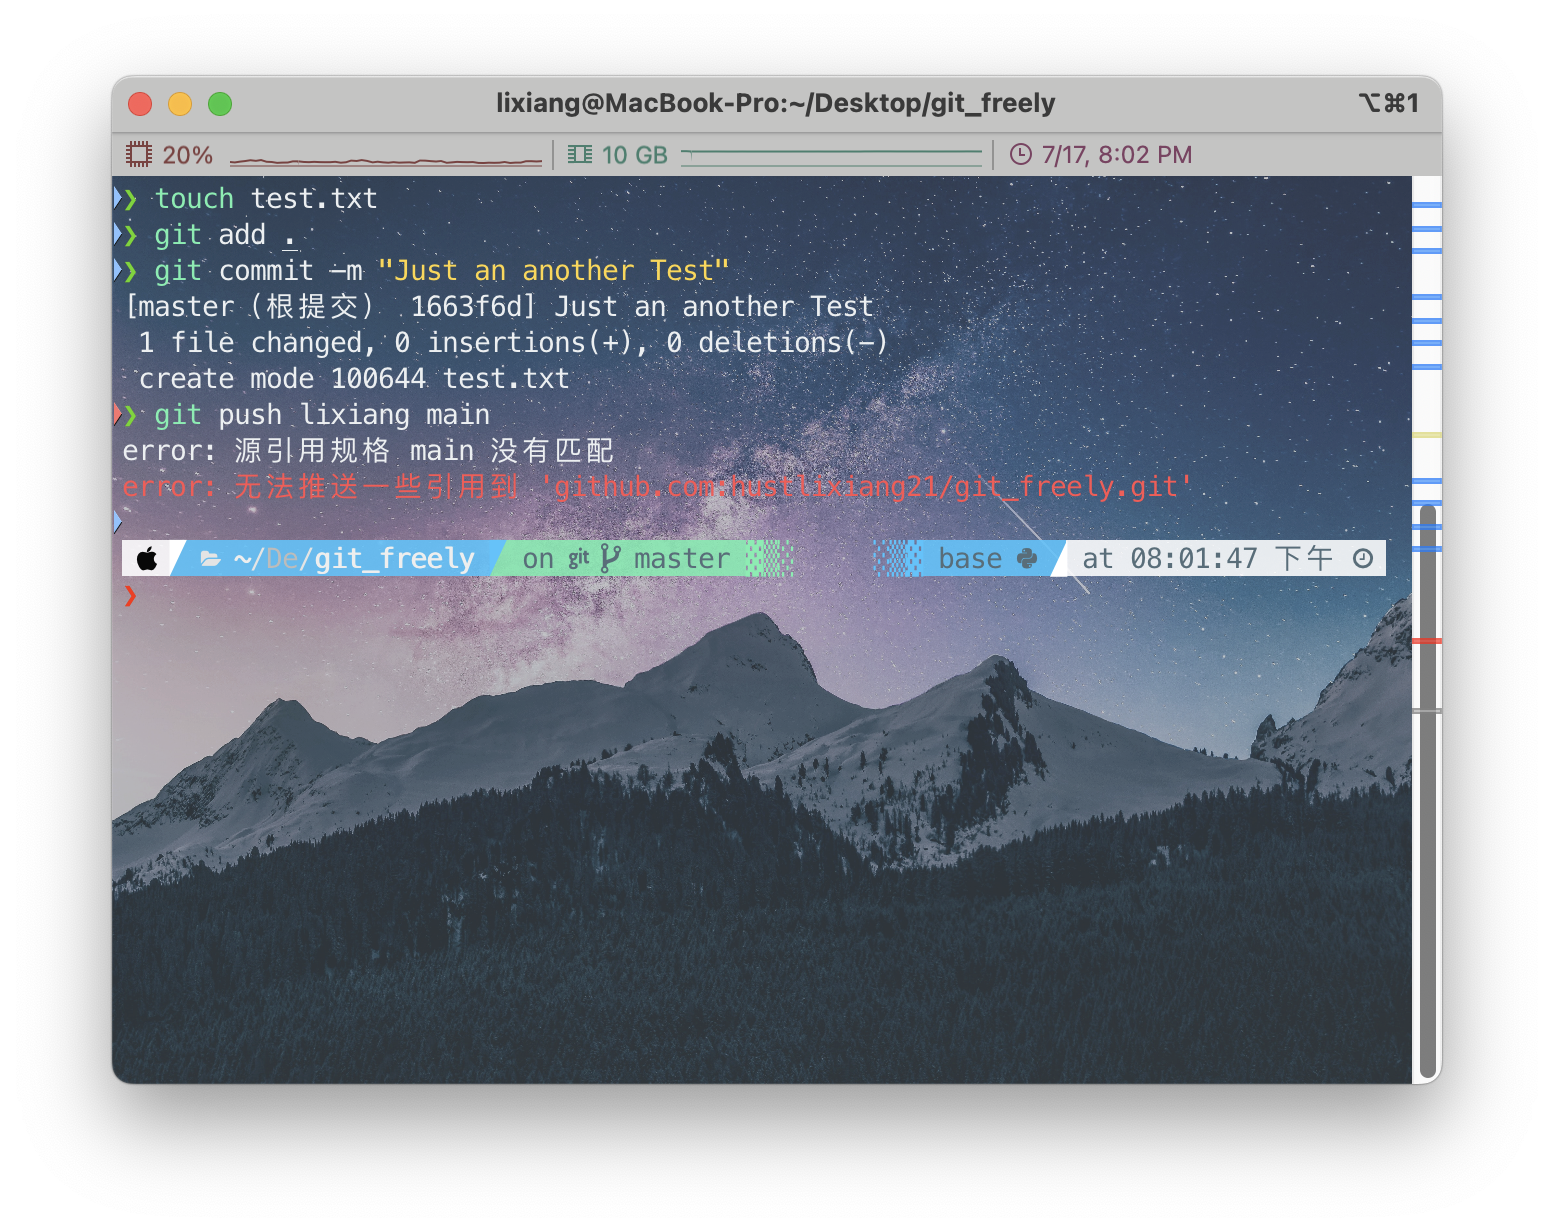
Why?
This may require understanding some basic principles of git. I believe everyone has heard it called distributed version control. Let’s just focus on the four words “version control”. Does your local repository have any version of the remote repository? You need to know that when you create a new repository on GitHub, it has a first version called initial commit (it might not be called this), but in short, I want to say that creation is accompanied by the first initialization commit, but the local doesn’t have it. You might ask, why not, how do you know? Let’s check with git log😜
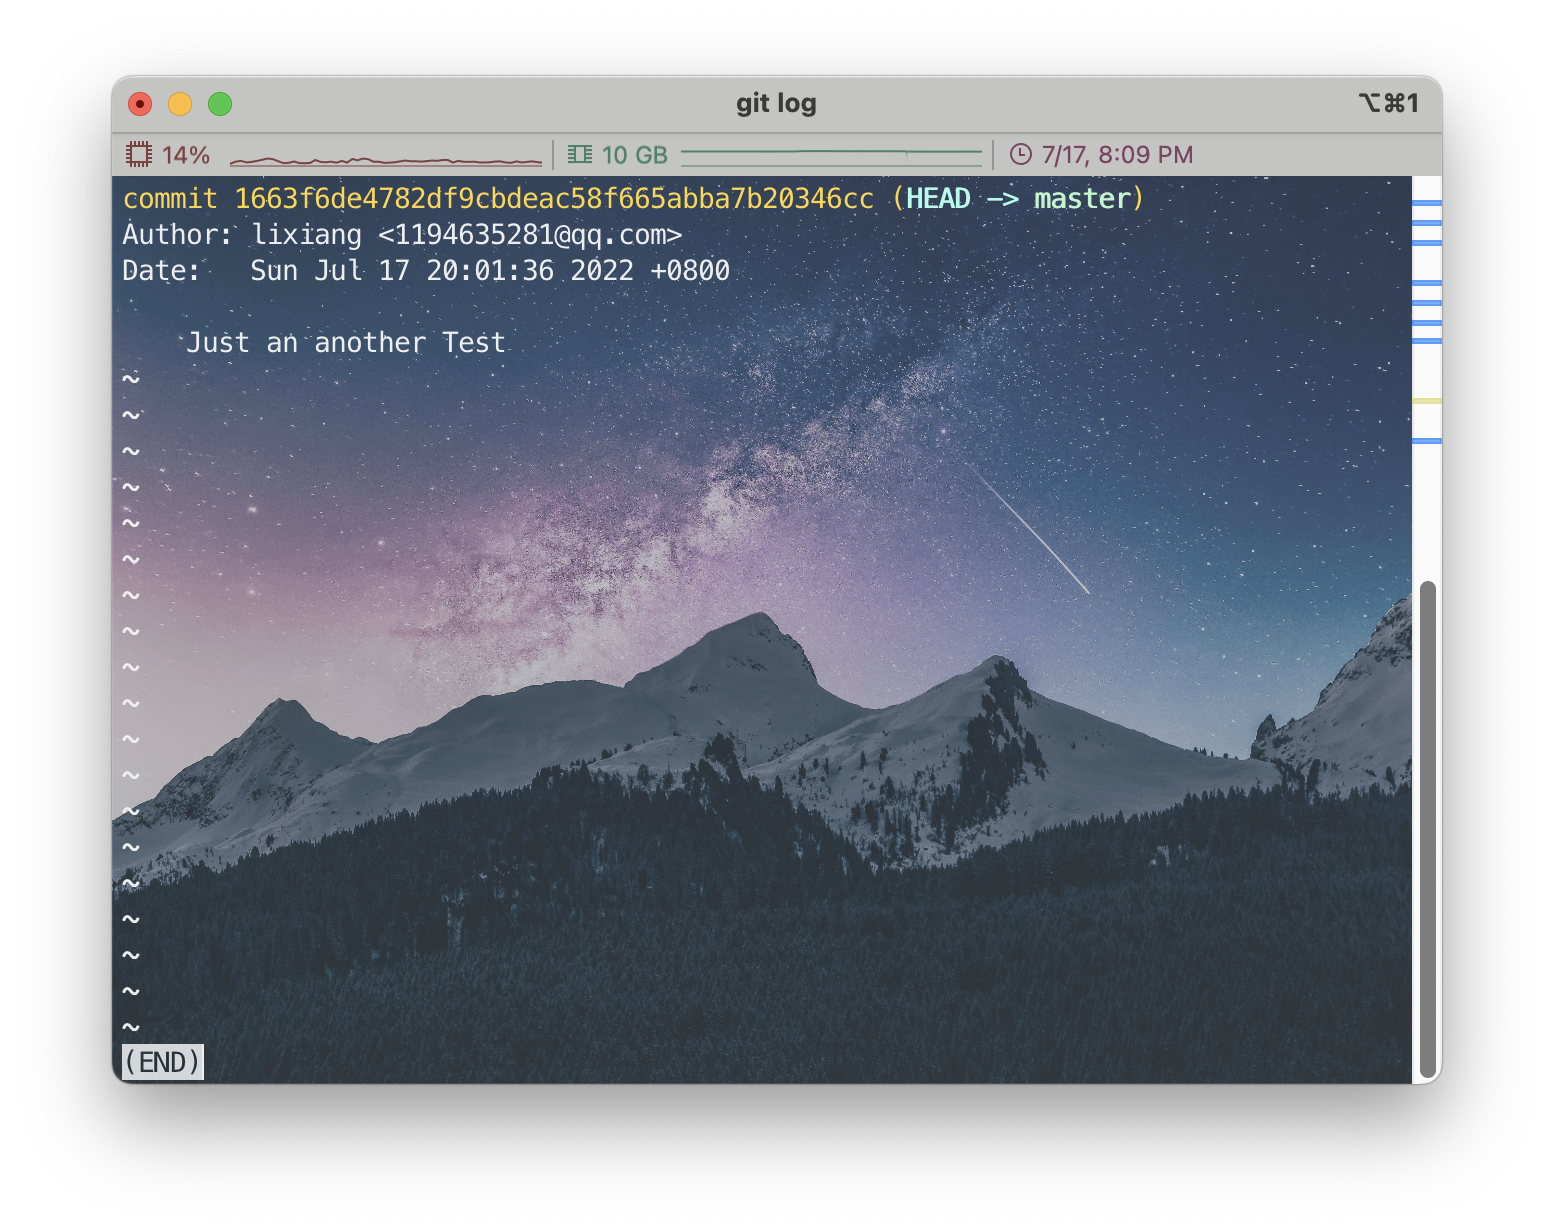
Let me explain, this is a commit I made to demonstrate the counterexample I mentioned. Actually, it should be that after git log, there’s nothing.
Solution:
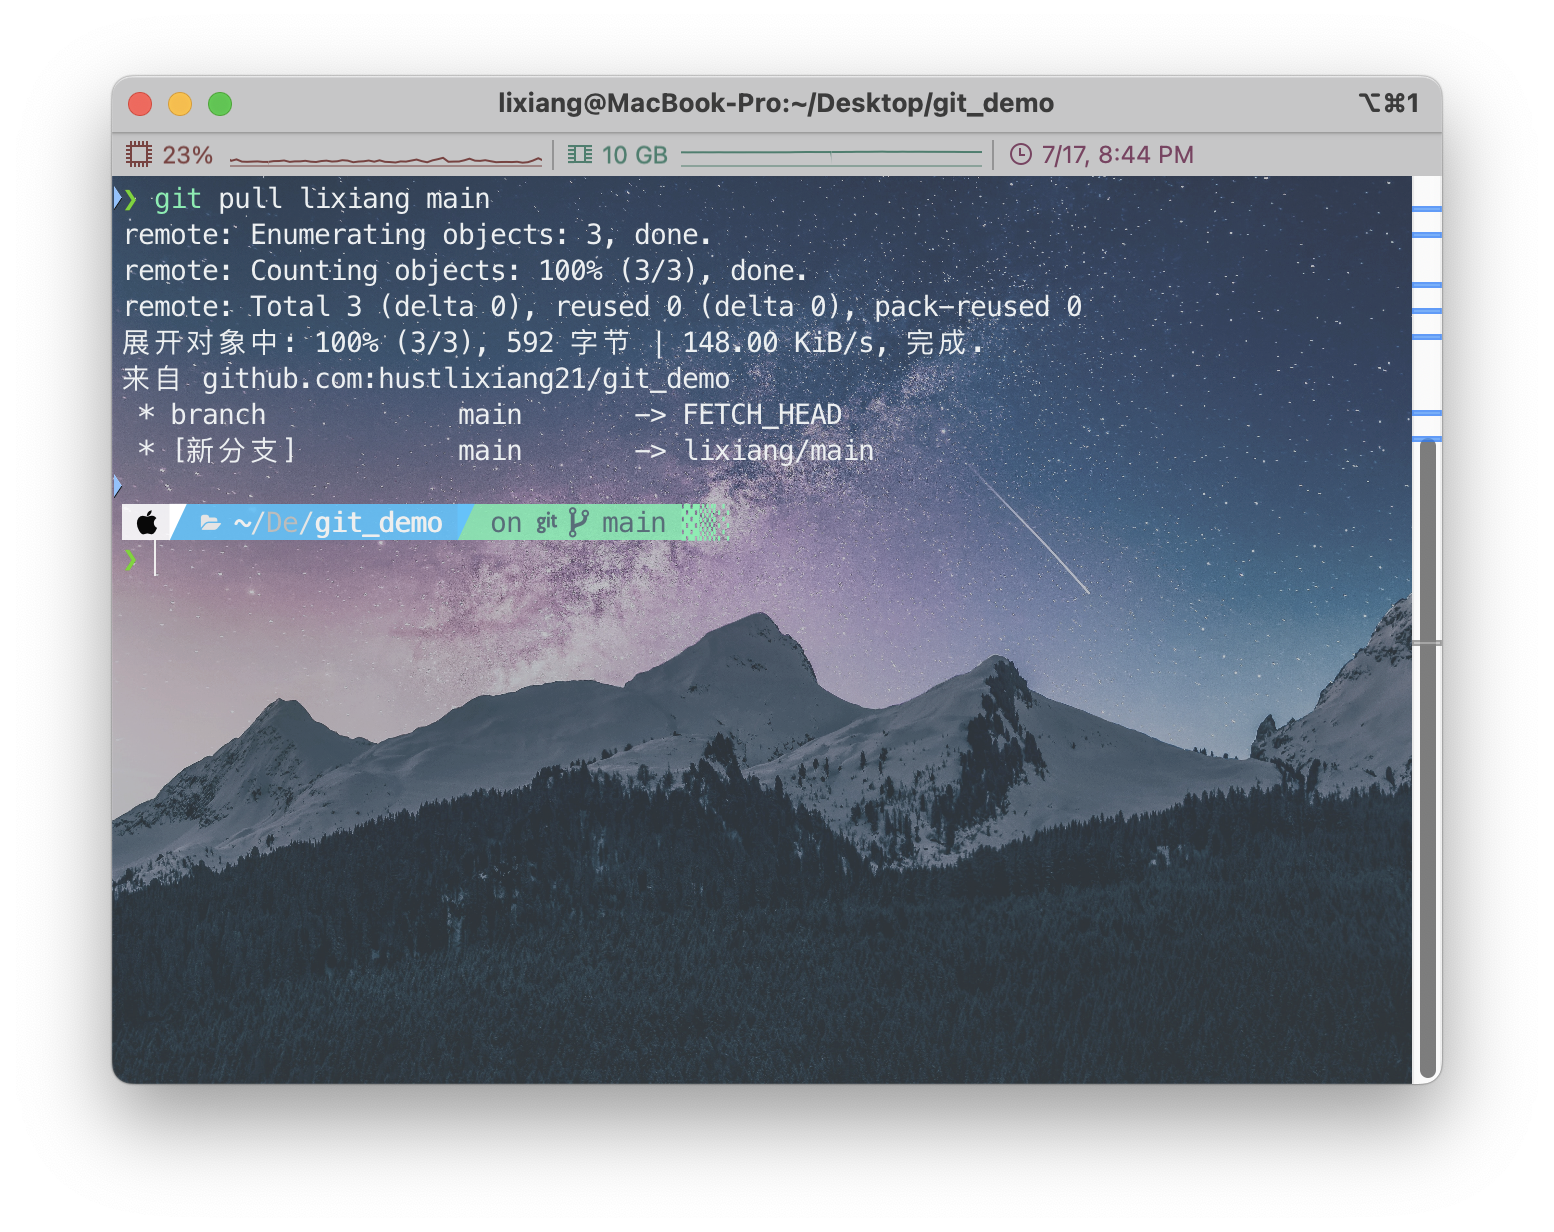
Just pull the initialization version of the remote repository, as the local base version, that’s what version control is about. git pull is very descriptive
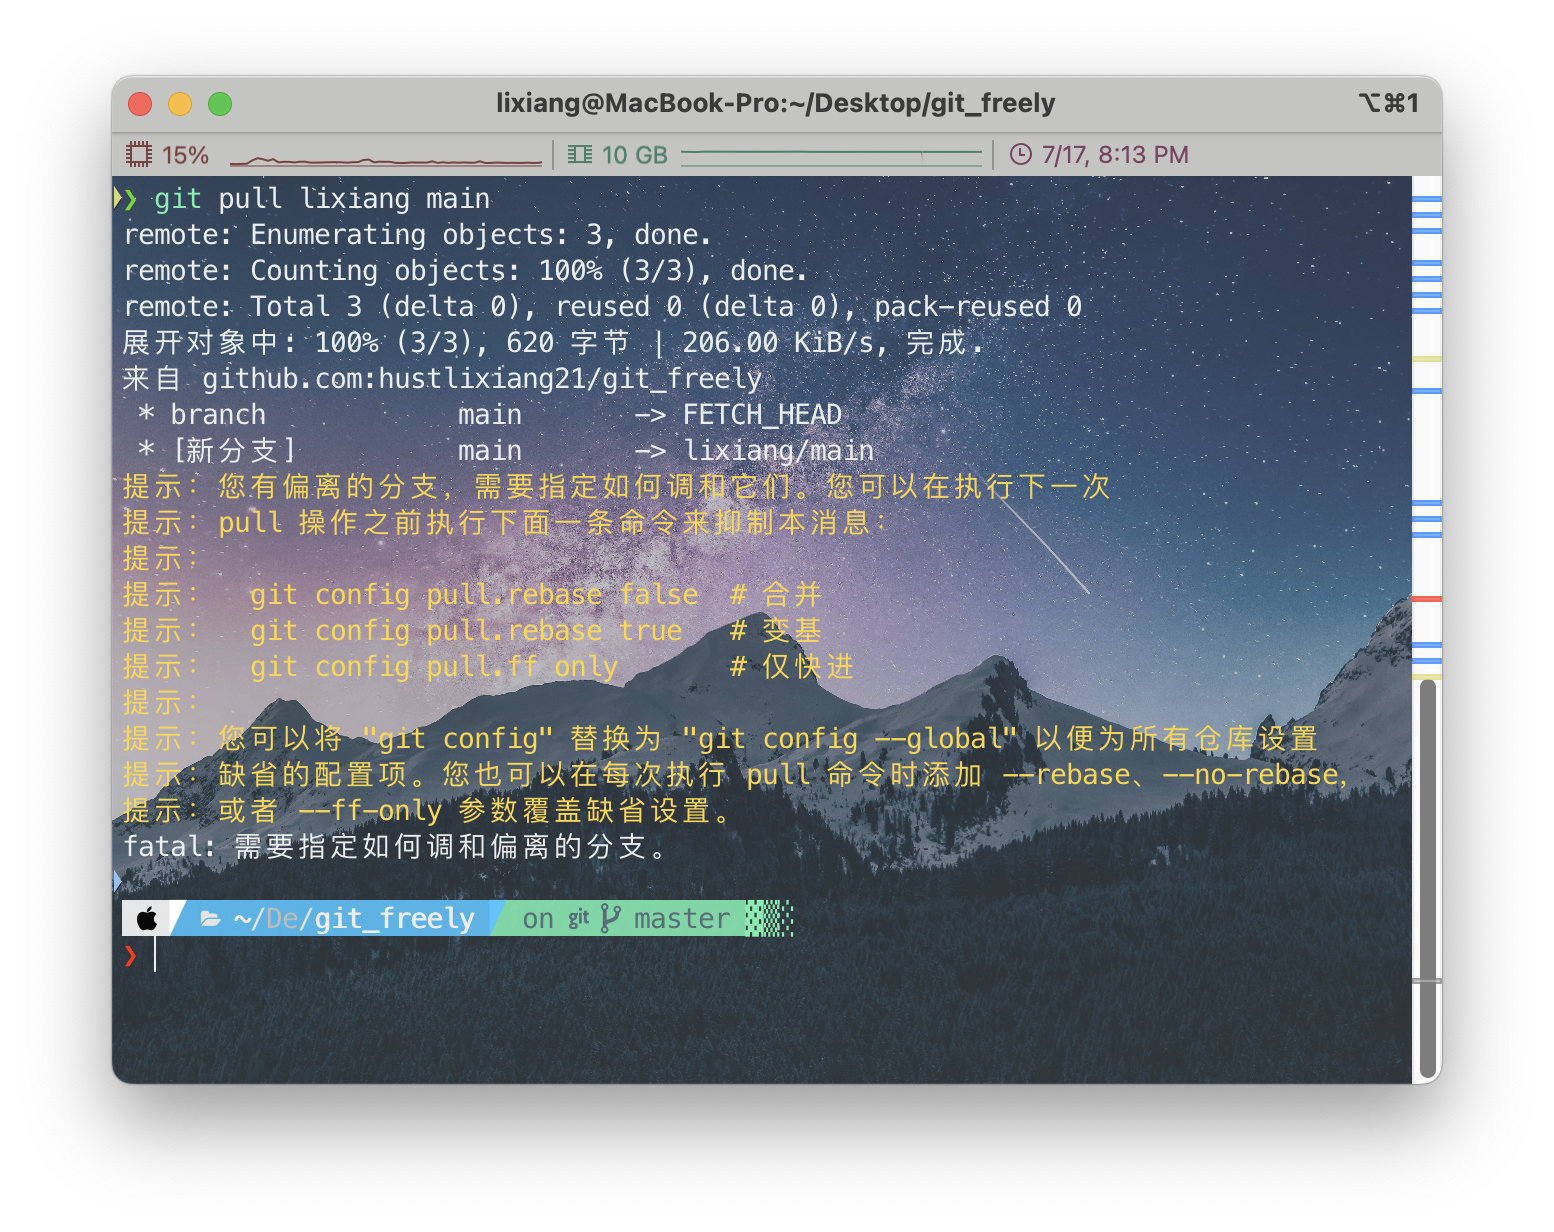
It prompts that this operation is unsuccessful because I have a
test.txt file, and the first commit of the local repository is different
from the initial version of the remote repository, so it prompts me
about divergent branches, blah blah blah, as its prompt says, you can
use git pull --rebase lixiang main
You might not know what this --rebase does, it’s
actually branch merge commit, directly merging the remote repository and
local repository regardless, and making one commit.
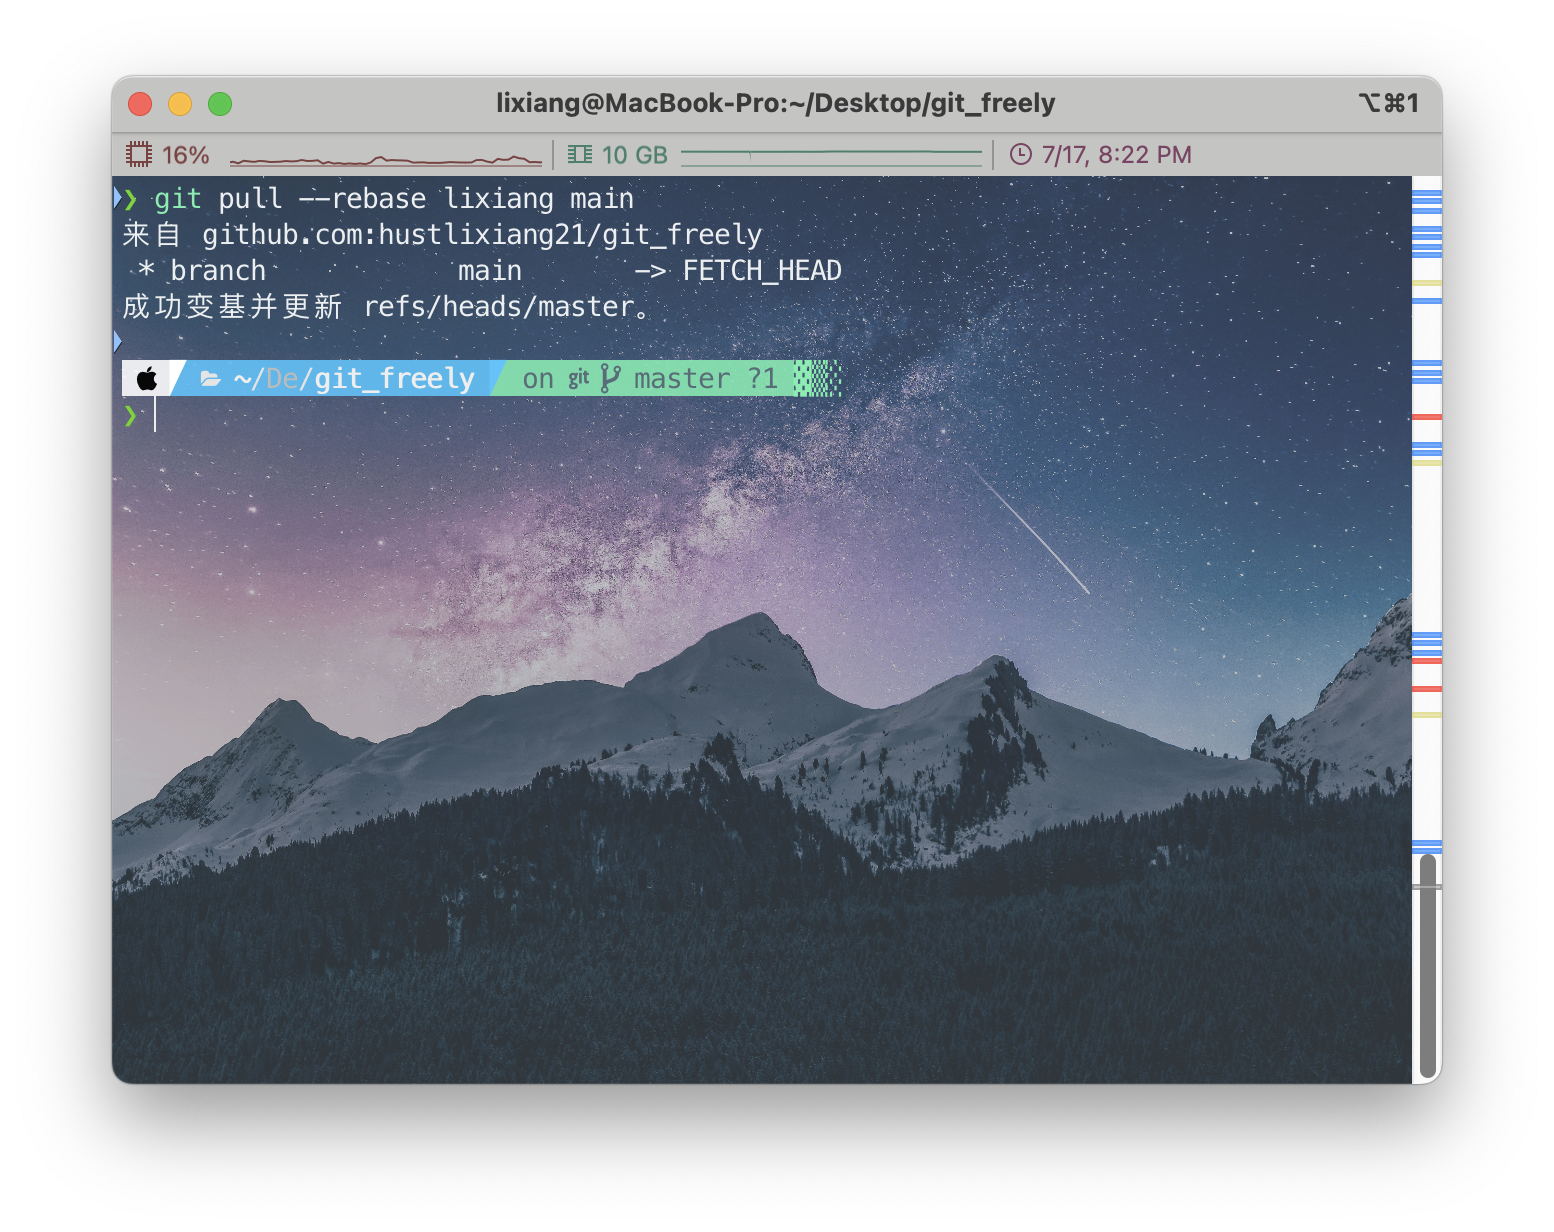
Success! Let’s check with git log……
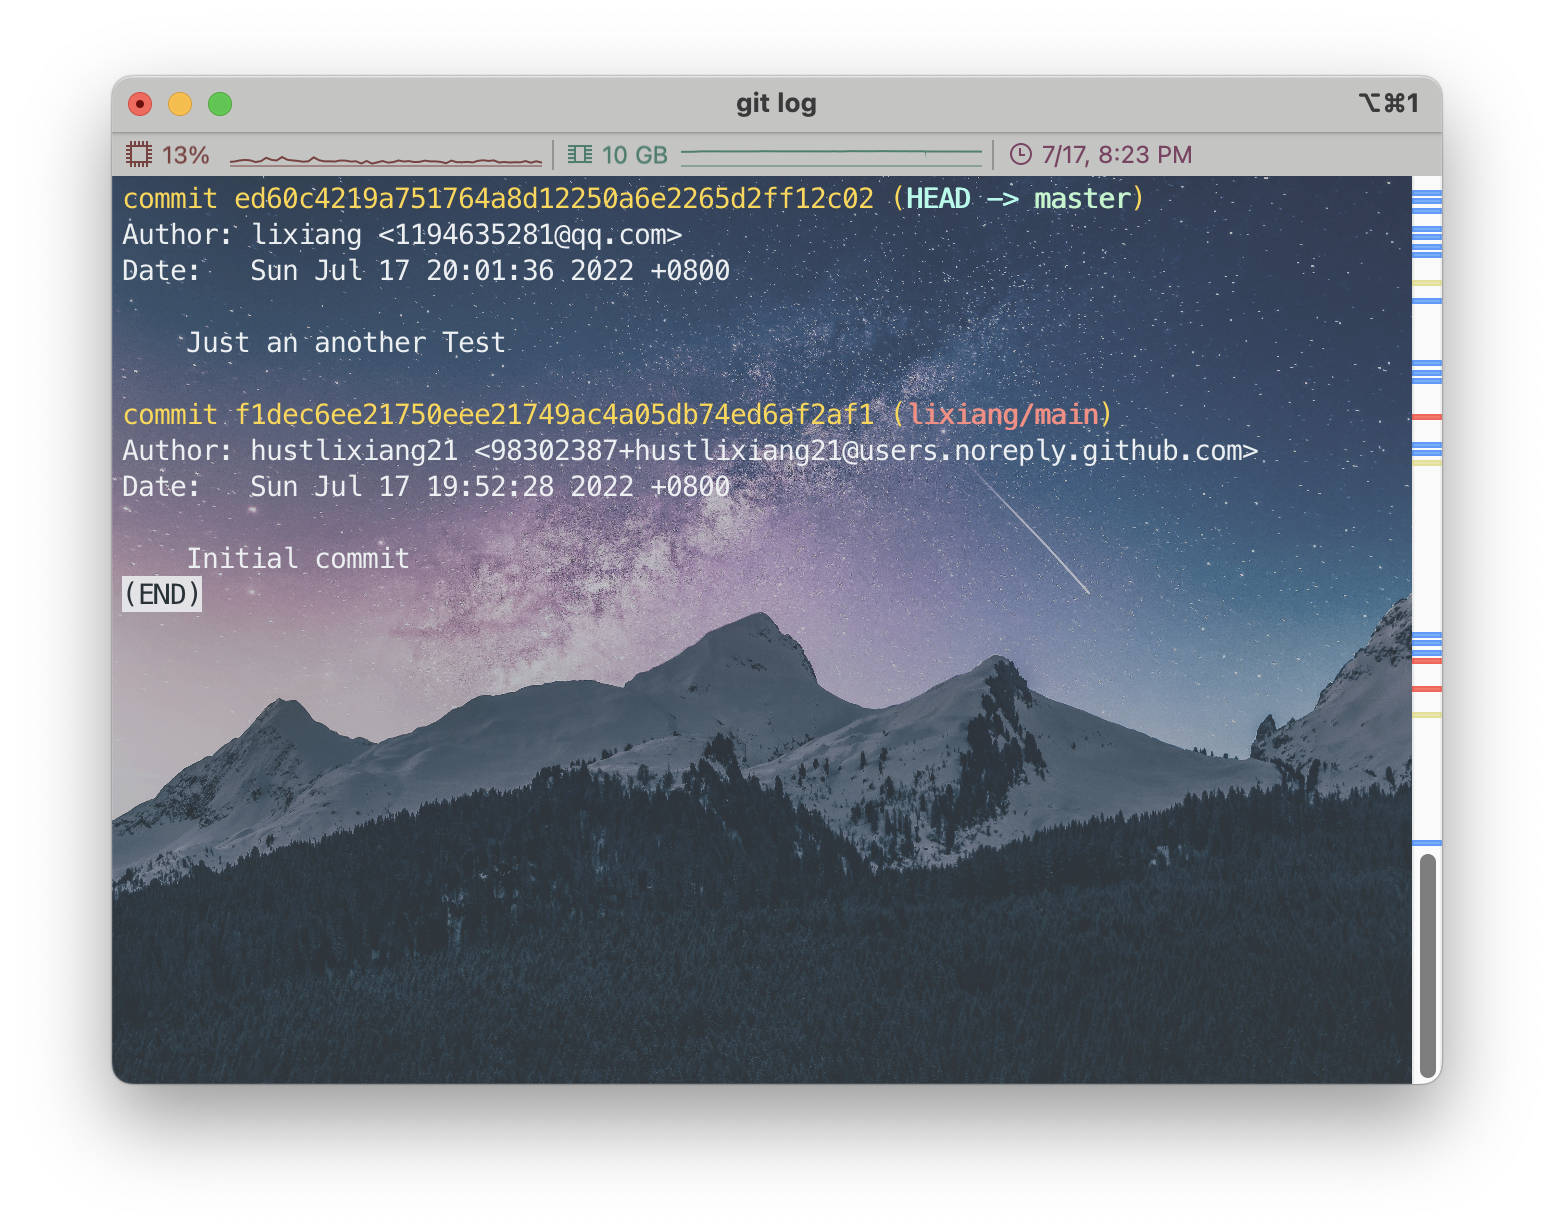
It can be seen that the Initial commit of the remote repository has been merged with my first local commit, but the remote and local repositories are not synchronized at this time! Need to upload to the remote repository.
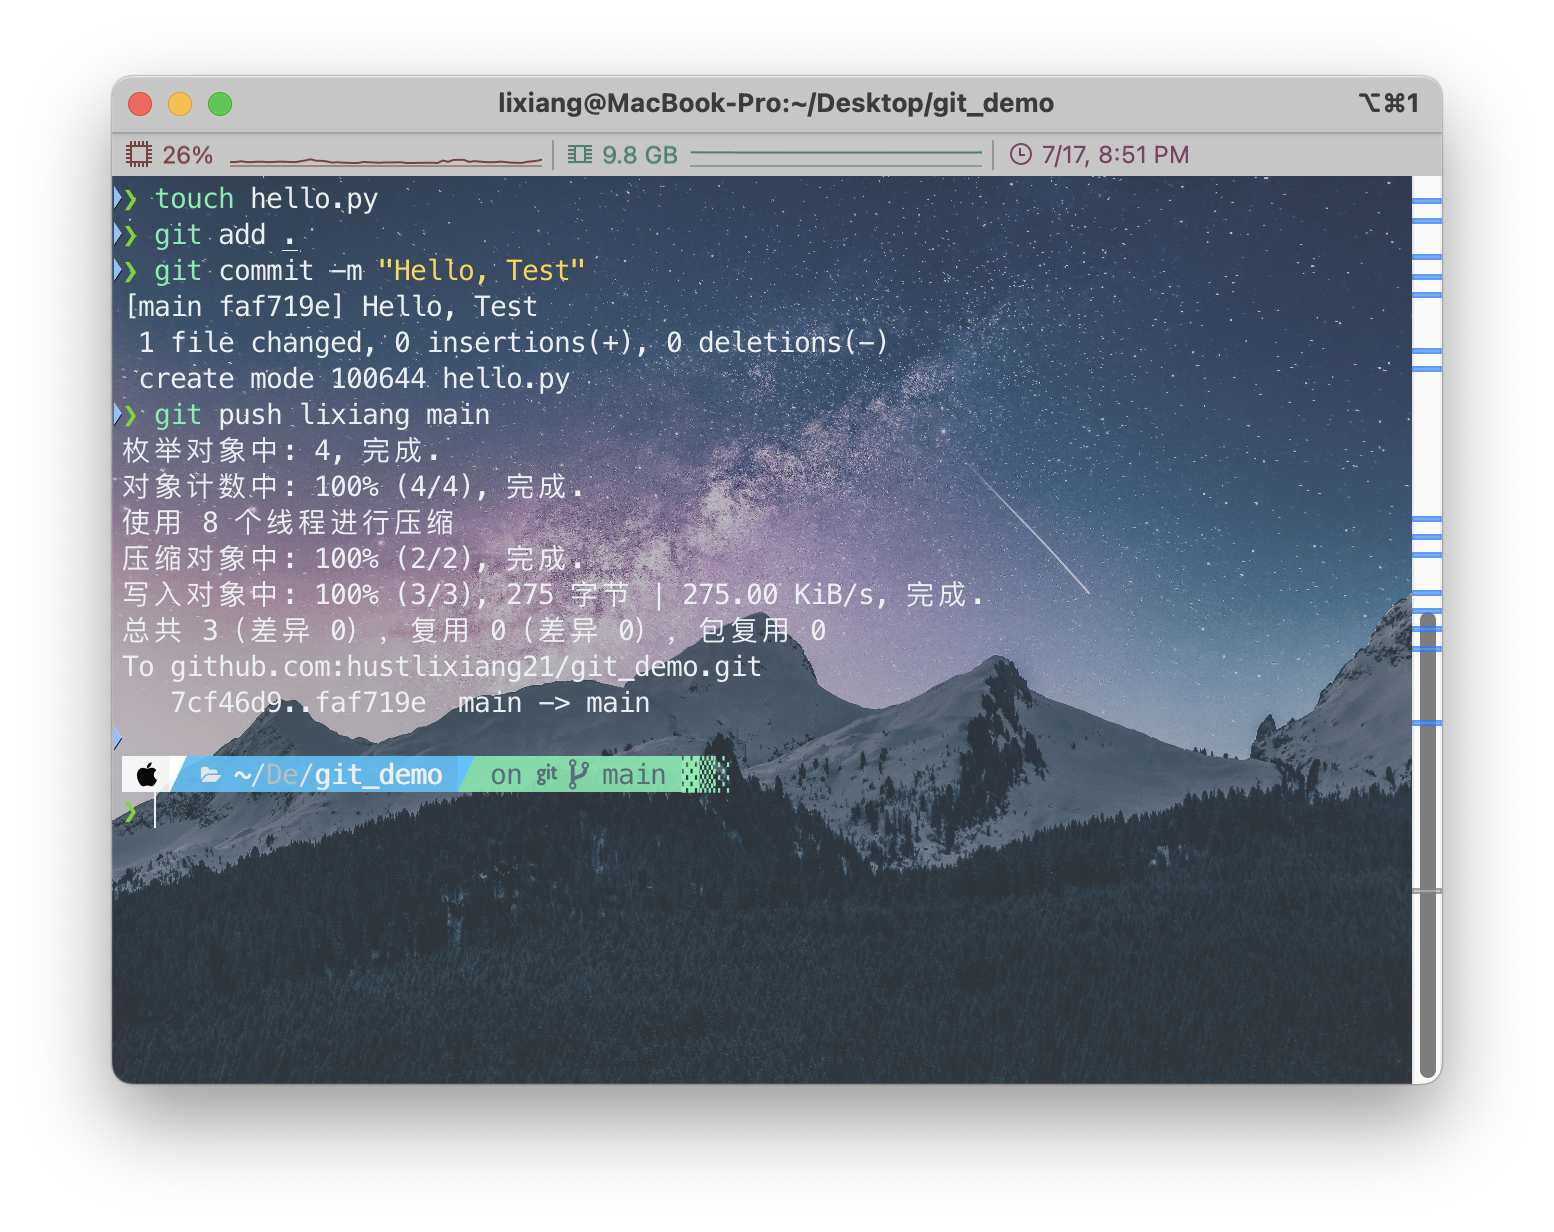
Step3: git push
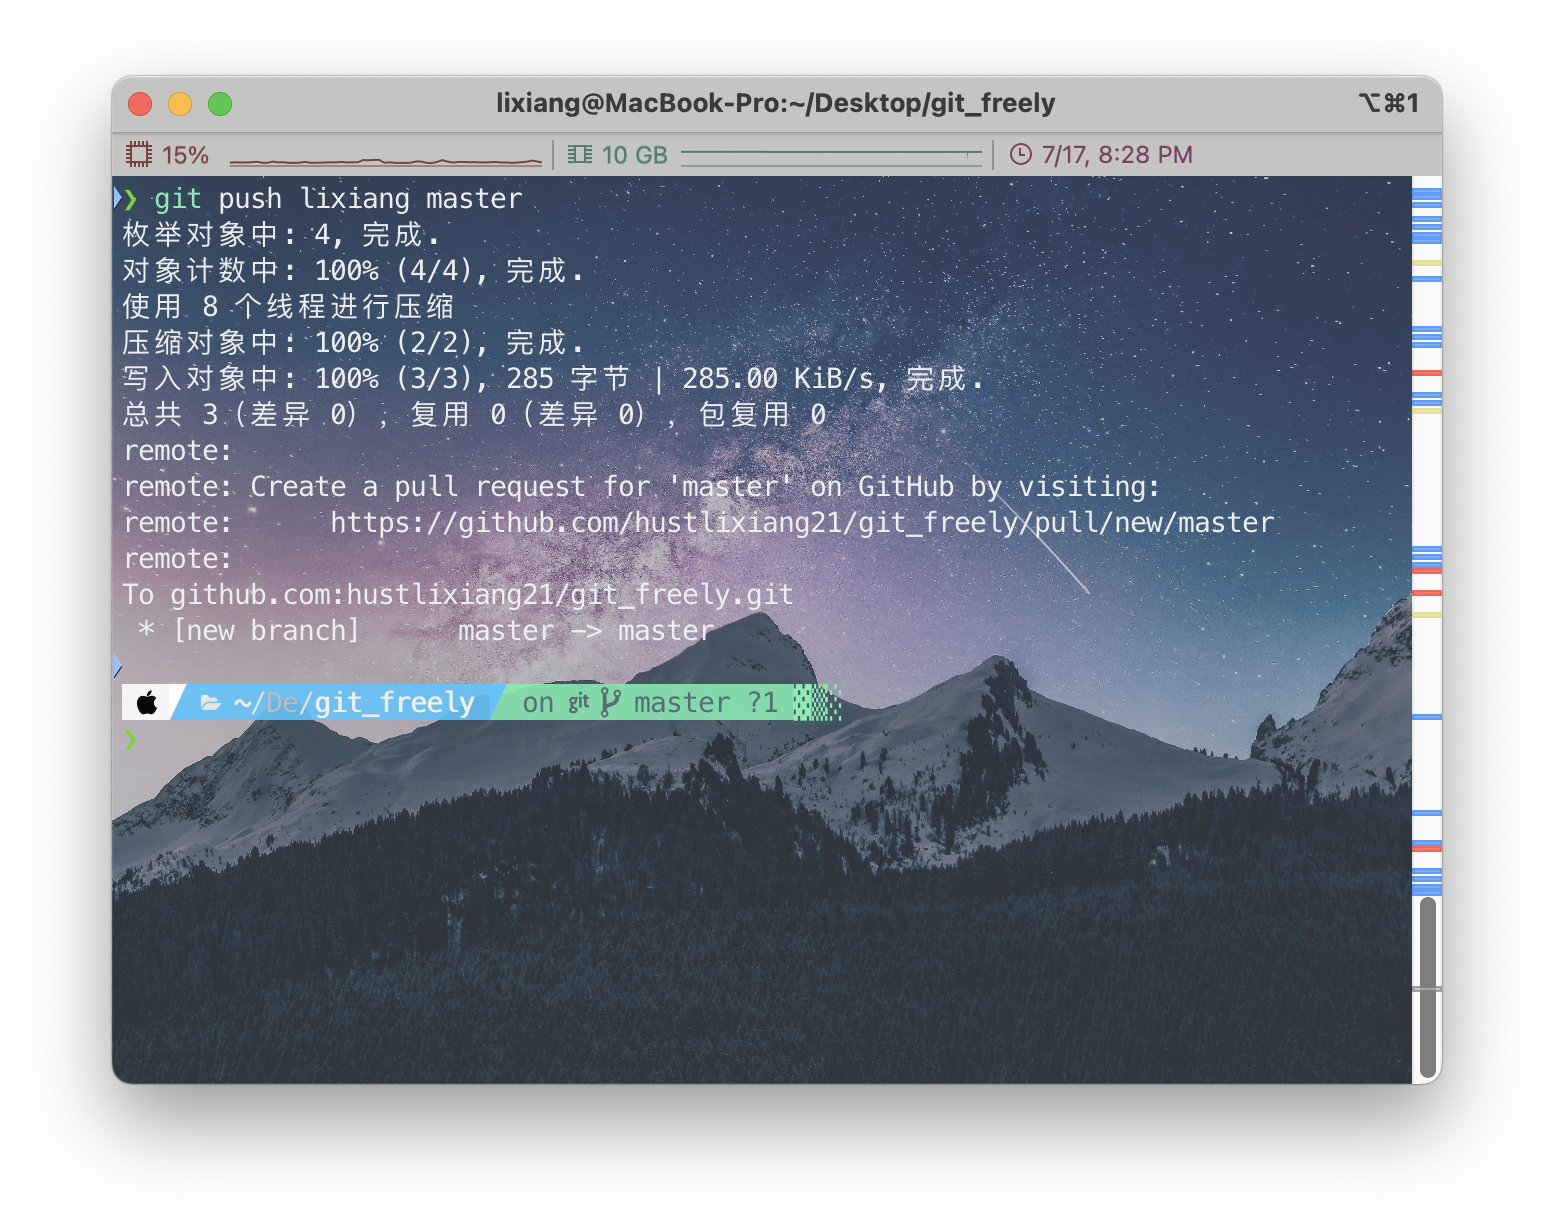
Success, there’s a small issue that the branch has changed. The reason here is that the default branch for local initialization is master, while the default branch for the remote repository is main. But it’s not a big problem.
Command to modify default branch
1 | git config --global init.defaultBranch <default branch name> |
If you don’t understand the above process, it’s okay, I made it complicated, it should actually be simpler, no problem, let me write a simple version.
Simplification of the Second Method
Step1: Create remote repository and initialize local repository

Step2: Manually establish remote connection

Step3: Pull (git pull) the initial version of the remote repository
If you read my previous explanation, you’ll find that the
--rebase parameter is not needed, because after
initialization I did nothing, the commit record is empty, and an empty
repository of course won’t produce any divergence when pulling anything.
With an empty repository, there’s no such thing as merging!
Let’s check with git log

Exactly! The final step!😬
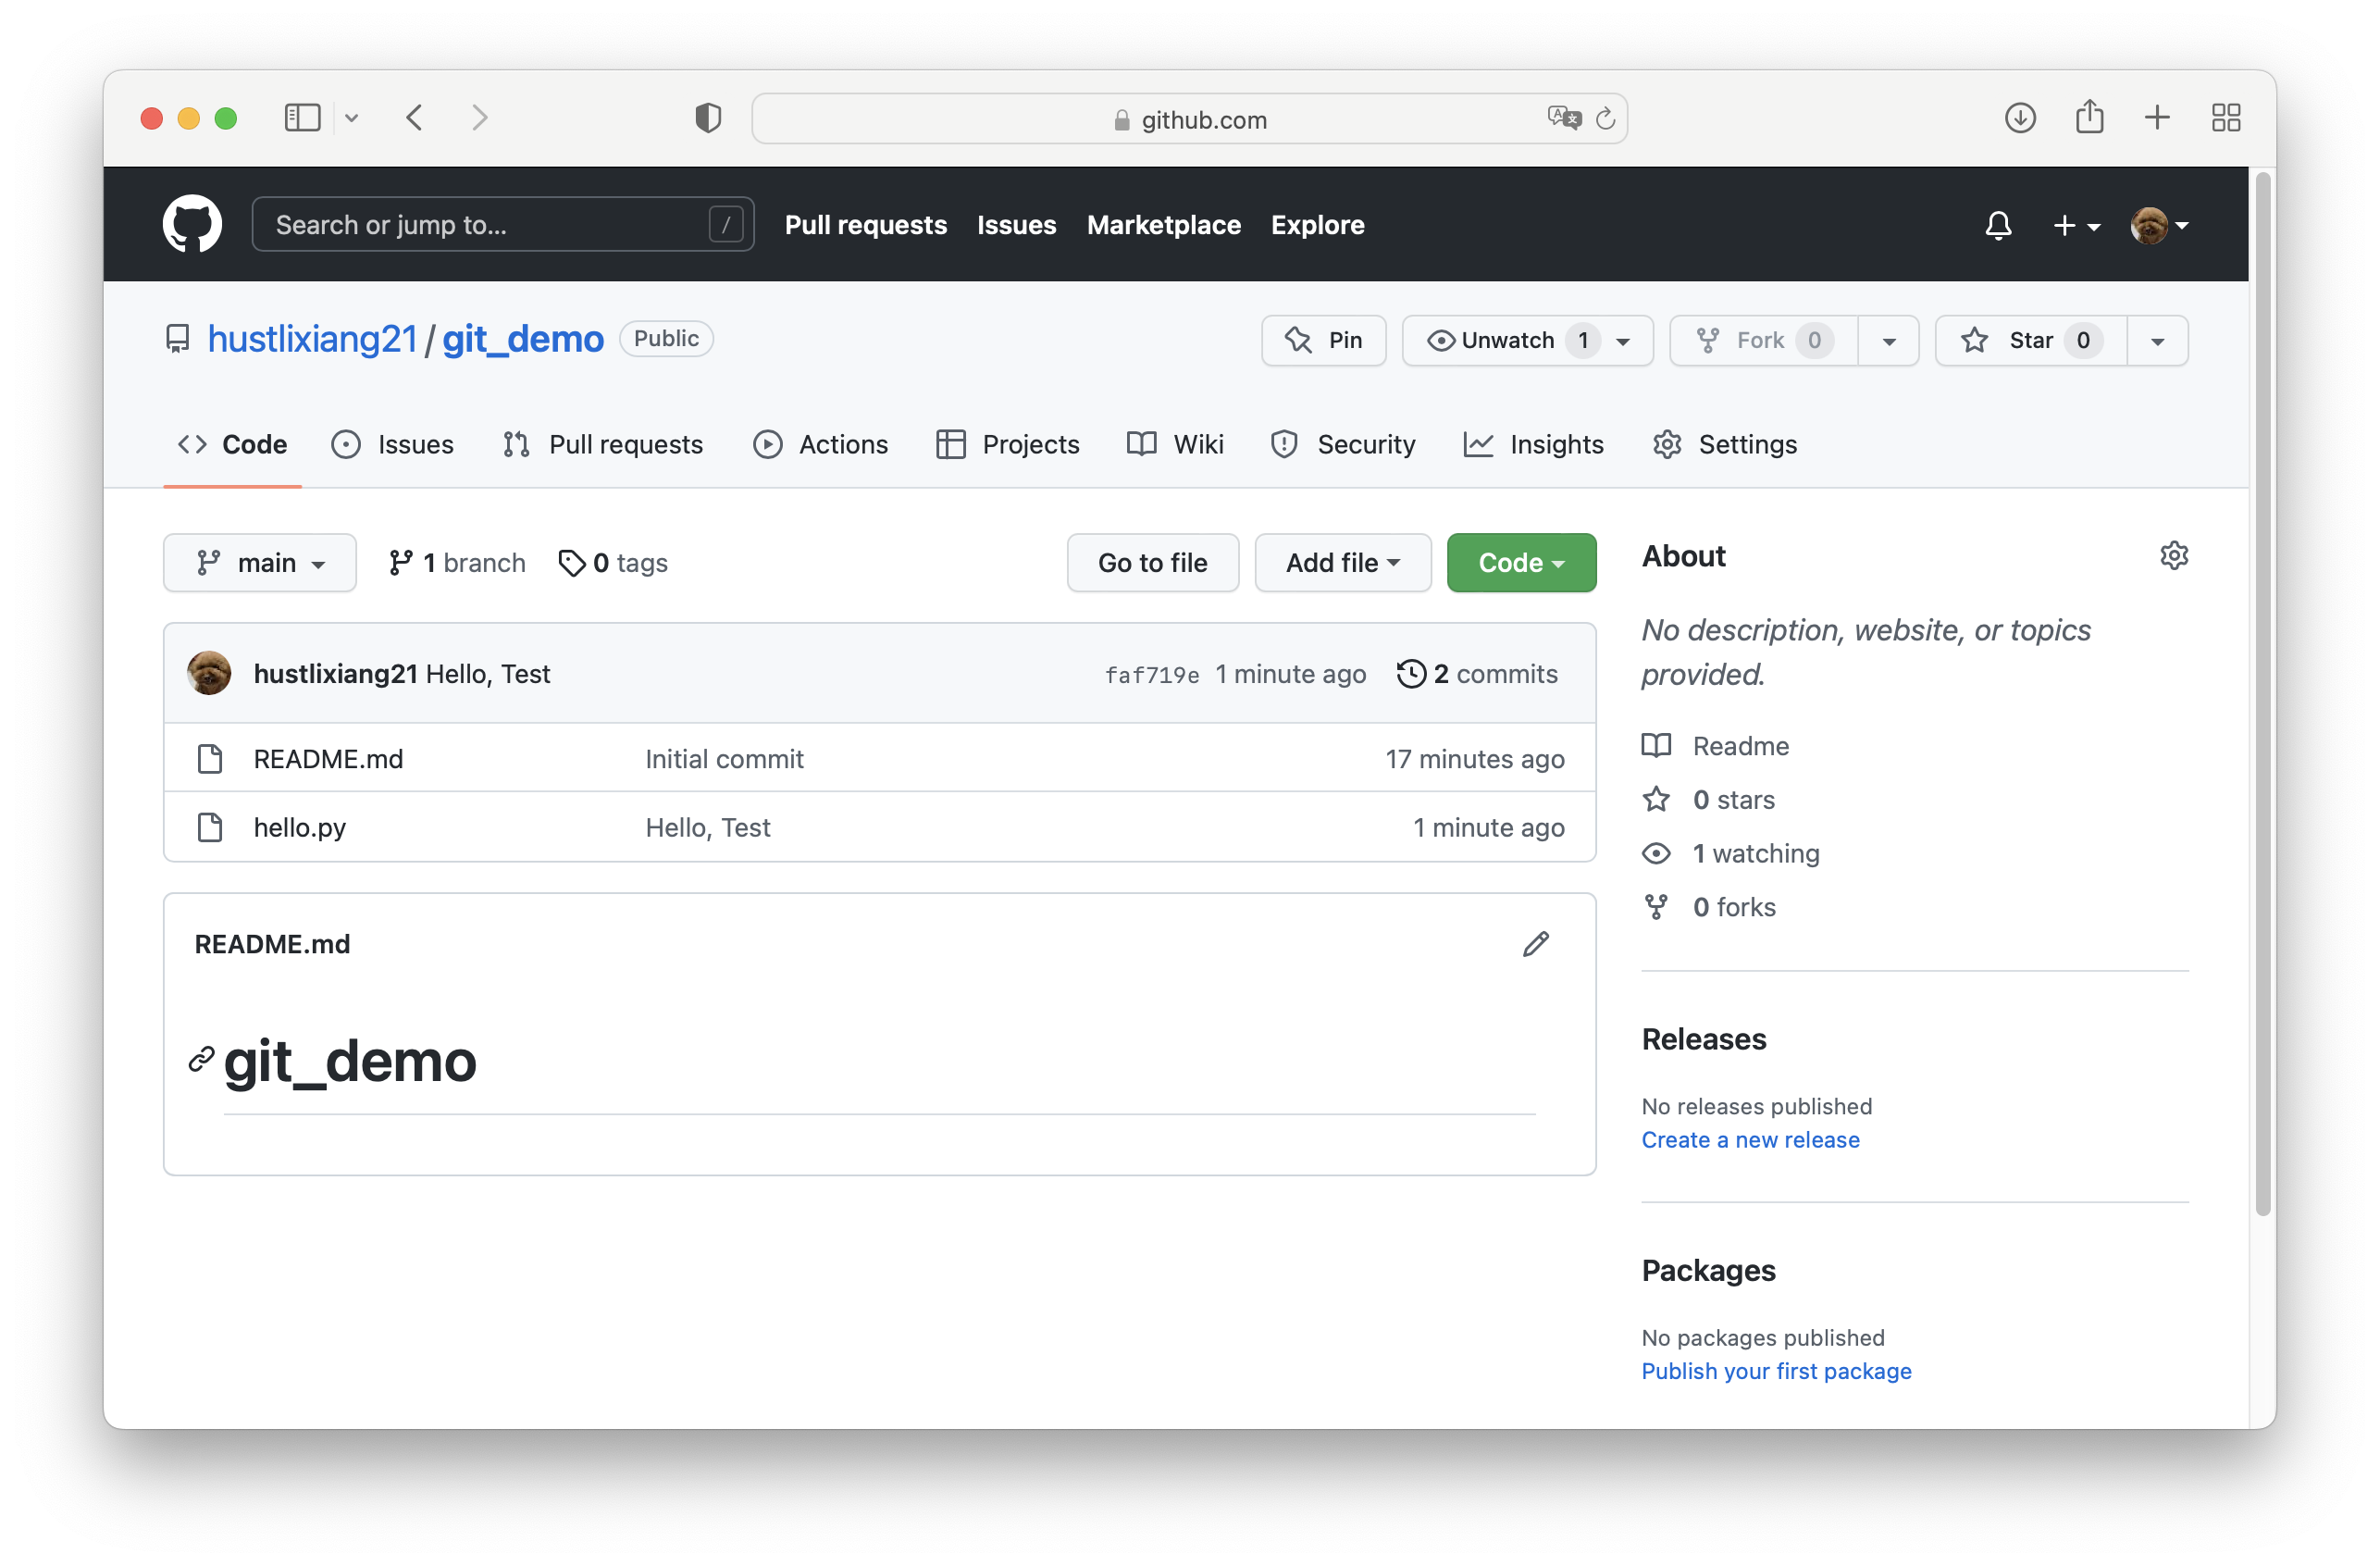
Step4: After creating test files, git push upload to remote repository
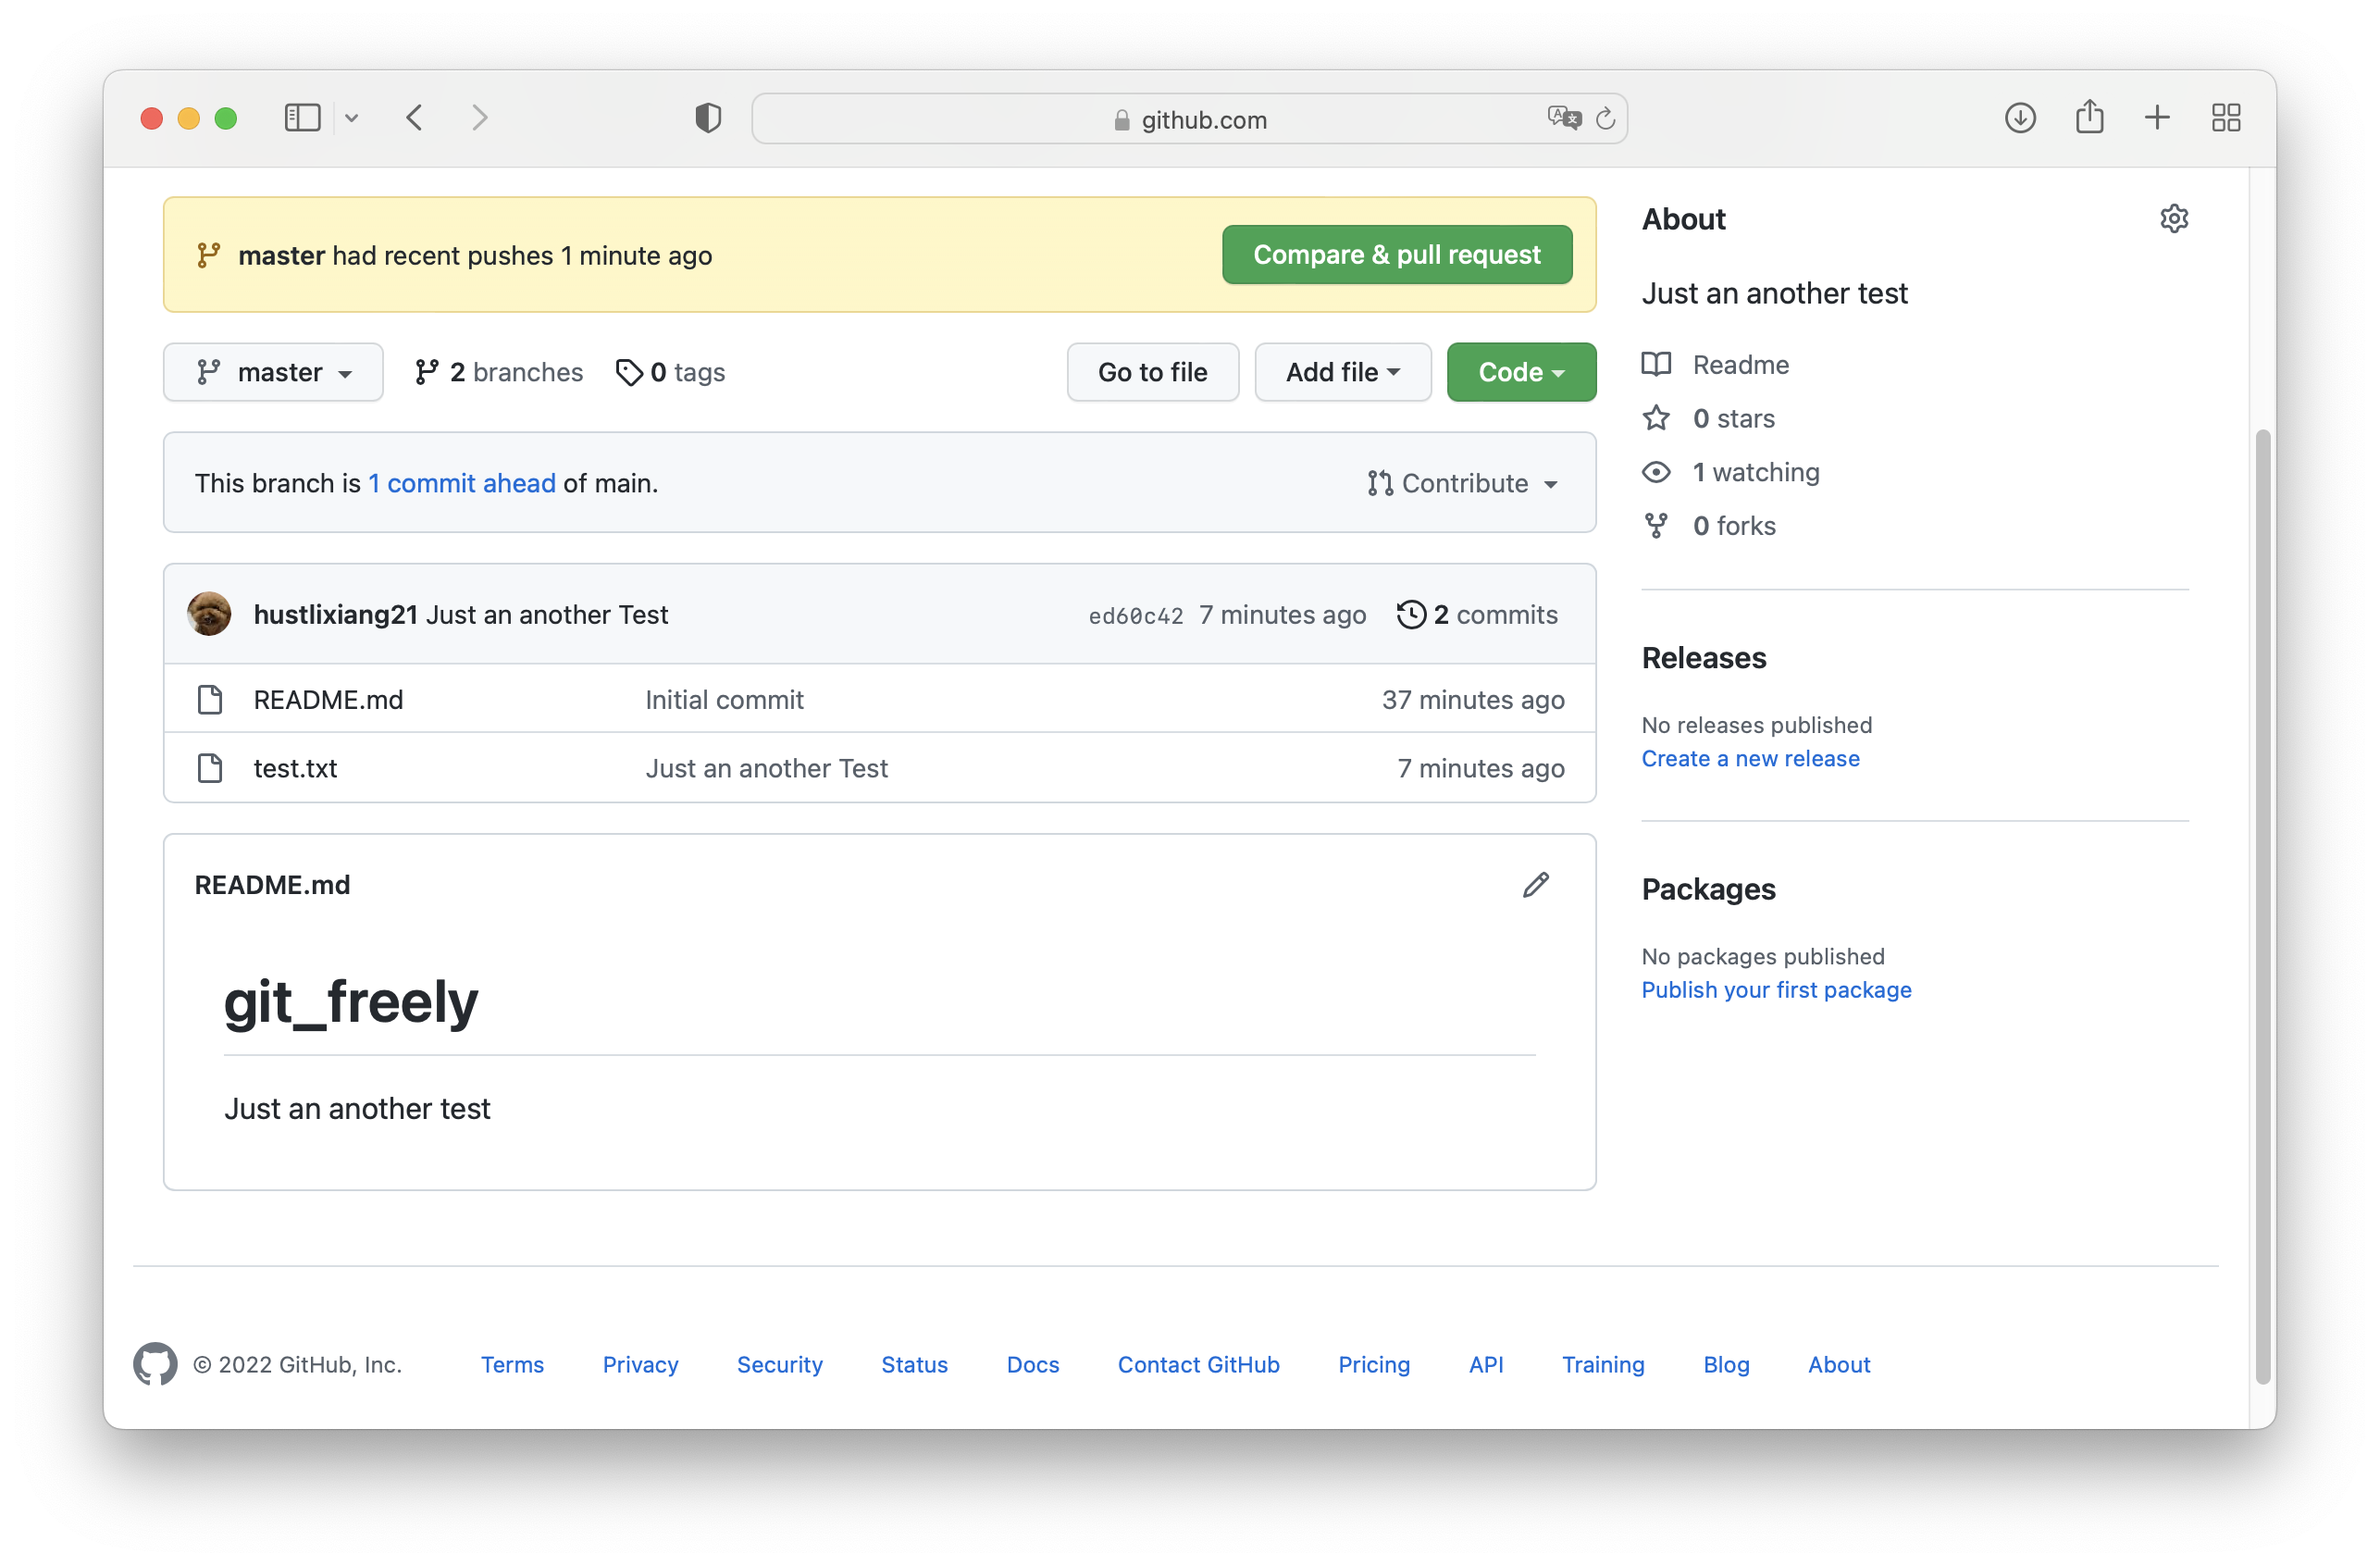
Let’s check on GitHub
Summary
I think what I said is just the tip of the iceberg, step-by-step teaching how to connect local and remote repositories and commit files you want to upload. Actually, GitHub supports direct file upload, see the Add File in the above image. I learned this without any particular purpose, just found it quite interesting. If you want to learn more deeply, you can refer to my previous blog post
By the way, this article is basically all written by me, but I definitely read many, many other people’s viewpoints and kept making mistakes myself, but that’s how learning works. I’ll attach a few original articles I referenced here.
Zhihu_Git Usage (Connecting Remote Repository)
CSDN_Delete Remote Repository Files
CSDN_Git Local File Upload to Remote Repository
CSDN_Delete Git Remote Repository Files
Take a careful look at what they wrote, it might be clearer than what I wrote. My purpose is still to establish connections step by step through my own understanding of the principles and processes. This can be said to be my first blog post that’s also somewhat of a tutorial. Thanks for watching!